Kia Sedona: Steering Column Shroud Panel Repair procedures - Crash Pad - Body (Interior and Exterior) - Kia Sedona YP Service ManualKia Sedona: Steering Column Shroud Panel Repair procedures

Third generation YP (2014-2026) / Kia Sedona YP Service Manual / Body (Interior and Exterior) / Crash Pad / Steering Column Shroud Panel Repair procedures

Replacement
[Steering column shroud lower panel]
   
Put on gloves to protect your hands.
   
•
When prying with a flat-tip screwdriver, wrap it with protective tape, and apply protective tape around the related parts, to prevent damage.
•
Use a plastic panel removal tool to remove interior trim pieces to protect from marring the surface.
•
Take care not to bend or scratch the trim and panels.
1.
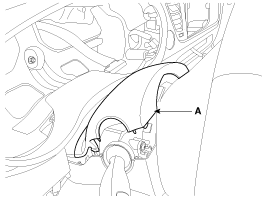
Separate the steering column shroud upper panel (A).

2.
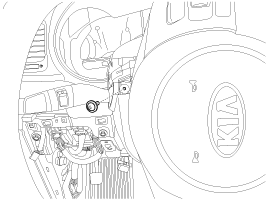
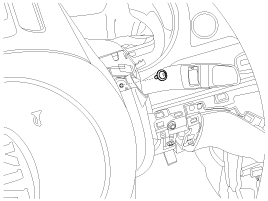
Loosen mounting screws on both sides.
[LH]

[RH]

3.
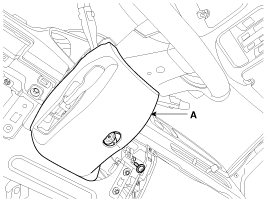
Loosen the mounting screw and remove the steering column shroud lower panel (A).

4.
Install in the reverse order of removal.
   
•
Replace any damaged clips.
[Steering column shroud upper panel]
   
Put on gloves to protect your hands.
   
•
When prying with a flat-tip screwdriver, wrap it with protective tape, and apply protective tape around the related parts, to prevent damage.
•
Use a plastic panel removal tool to remove interior trim pieces to protect from marring the surface.
•
Take care not to bend or scratch the trim and panels.
1.
Remove the center fascia panel.
(Refer to Crash Pad - "Center Fascia Panel")
2.
Install in the reverse order of removal.
   
Replace any damaged clips.
Steering Column Shroud Panel Components and Components Location
Component Location 1. Steering column shroud lower panel2. Steering column shroud upper panel ...

Crash Pad Side Cover Components and Components Location
Component Location [LH] 1. Crash pad side cover [LH] [RH] 1. Crash pad side cover [RH] ...

Other Information:

How to use the Smart Tailgate
The tailgate can be opened with notouch activation satisfying all the conditions below. After 15 seconds when all doors are closed and locked Positioned in the detecting area for more than 3 s ...

Valve Body Repair procedures
Removal 1. Remove the under cover. (Refer to Engine Mechanical System - "Engine Room Under Cover"). 2. Remove the ATF drain plug (A), allow the fluid to drain out and then reinstall the drain ...

Categories

Copyright © www.kisedona.com 2016-2026