 Kia Sedona: Fuel Filler Door Release Actuator Repair procedures
Third generation YP (2014-2026) / Kia Sedona YP Service Manual / Body Electrical System / Fuel Filler Door / Fuel Filler Door Release Actuator Repair procedures
| Removal |
Fuel Filler Door Release Actuator
| 1. |
Disconnect the negative (-) battery terminal. |
| 2. |
Remove the luggage side trim [LH].
(Refer to Body - "Luggage Side Trim") |
| 3. |
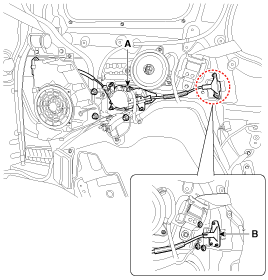
Disconnect the connector (A) and then slightly separate the power sliding door drive unit (B) after loosening the nuts.
|
| 4. |
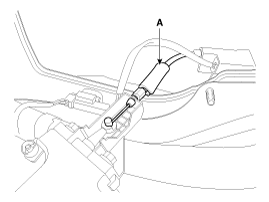
Disconnect the fuel filler door release cable (A).
|
| 5. |
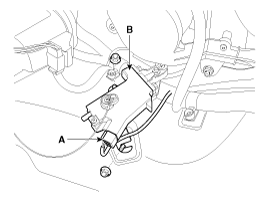
Disconnect theh connector (A) and then remove the fuel filler door release actuator (B) after loosening the nuts.
|
| 6. |
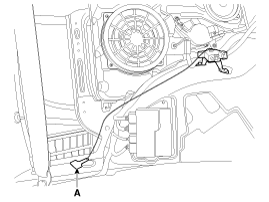
Remove the fuel filler handle cable (A).
|
Fuel Filler Door Catch & Cable
| 1. |
Disconnect the negative (-) battery terminal. |
| 2. |
Remove the fuel filler door release actuator.
(Refer to "Fuel Filler Door Release Actuator") |
| 3. |
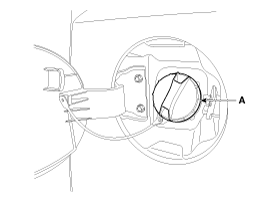
Open the fuel door cap (A).
|
| 4. |
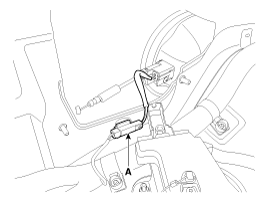
Disconnect fuel filler door catch & cable connector (A).
|
| 5. |
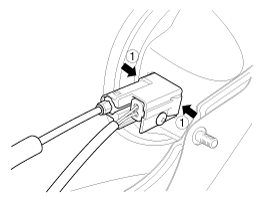
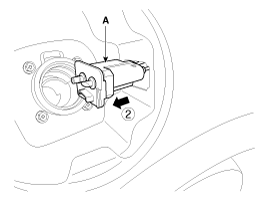
Remove the fuel filler door catch & cable (A) after pushing the hooks inside.
|
| Installation |
Fuel Filler Door Release Actuator
| 1. |
Install the fuel filler door release actuator after connecting the connector.
|
| 2. |
Connect fuel filler door release actuator cable. |
| 3. |
Install the power sliding door drive unit after connecting the connector.
|
| 4. |
Install the luggage side trim [LH]. |
| 5. |
Disconnect the negative (-) battery terminal. |
Fuel Filler Door Catch & Cable
| 1. |
Install the fuel filler door catch & cable. |
| 2. |
Connect fuel filler door catch & cable connector. |
| 3. |
Install the fuel door cap. |
| 4. |
Install the fuel filler door release actuator. |
| 5. |
Disconnect the negative (-) battery terminal. |
| Inspection |
| 1. |
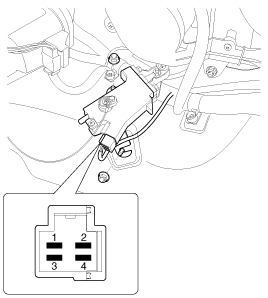
Check for continuity between terminal No. 2 and No. 4. If there is no continuity, replace the fuel filler door release actuator.
|
 Components and Components Location
Component Location
1. Fuel filler door open switch2. Fuel filler door release actuator
...
Other Information:
Intake Actuator Repair procedures
Inspection
1.
Turn the ignition switch OFF.
2.
Disconnect the intake actuator connector.
3.
Verify that the actuator operates to the recirculation position when 12V is connected to termina ...
Use high quality ethylene glycol coolant
Your vehicle is delivered with high quality ethylene glycol coolant in the cooling
system. It is the only type of coolant that should be used because it helps prevent
corrosion in the cooling syst ...
Categories
- Home
- First Generation
- Second Generation
- Third generation
- Kia Sedona YP 2014-2026 Owners Manual
- Kia Sedona YP 2014-2026 Service Manual
Copyright © www.kisedona.com 2016-2026

