
 Kia Sedona: Front Hub / Knuckle / Tone Wheel Repair procedures
Third generation YP (2014-2026) / Kia Sedona YP Service Manual / Driveshaft and axle / Front Axle Assembly / Front Hub / Knuckle / Tone Wheel Repair procedures
| Removal |
| 1. |
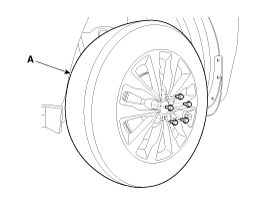
Remove the front wheel and tire (A) from front hub.
|

| 2. |
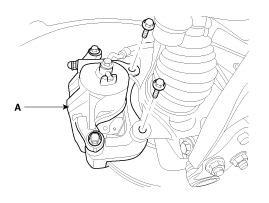
Remove the brake caliper mounting bolts, and then place the brake caliper assembly (A) with wire.
|
| 3. |
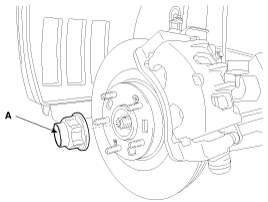
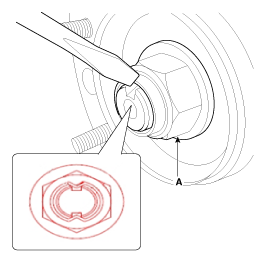
Remove the caulking nut (A).
|

| 4. |
Remove the wheel speed sensor (A) and brake hose bracket bolt (B).
|
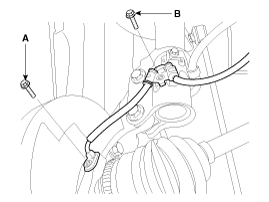
| 5. |
Remove the tie rod end ball joint (C) from the knuckle.
|
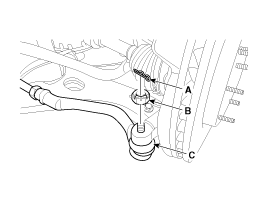
| 6. |
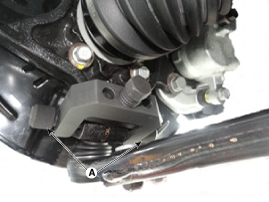
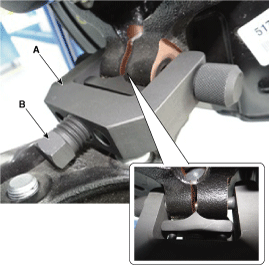
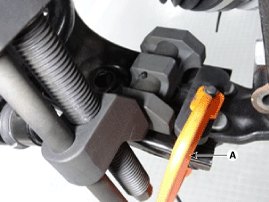
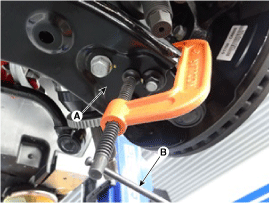
Disconnect the ball joint(A) from knuckle using the special tool (09568-4A000).
|
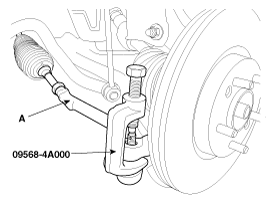
| 7. |
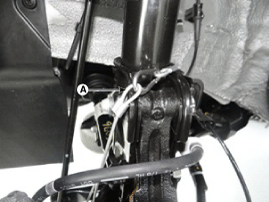
Remove the lower arm (A) mounting bolt and nut from the knuckle.
|
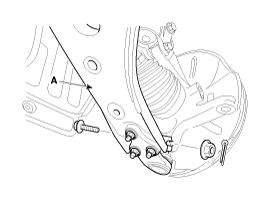
| 8. |
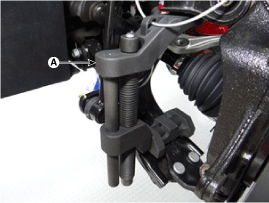
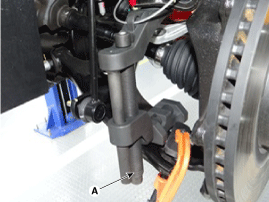
Remove the front lower arm from the front knuckle using the SST (0K545-A9100).
|
| 9. |
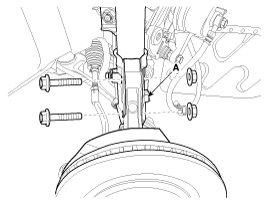
Remove the bolt after remove the strut assembly from the knuckle.
|
| 10. |
Install in the reverse order of removal.
|

| 11. |
Check the front alignment.
(Refer to Suspension System - "Front Alignment") |
| Disassembly |
| 1. |
Remove the brake disc (B) from the knuckle assembly (A).
|
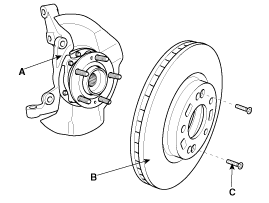
| 2. |
Remove the hub assembly mounting bolts (B) from the knuckle (A).
|
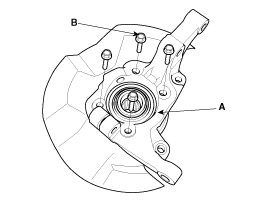
| 3. |
Remove the hub assembly (C) and the dust cover (B) from the knuckle (A).
|
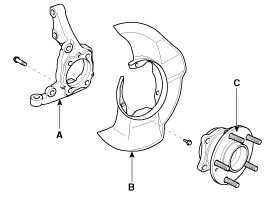
| 4. |
Reassembly in the reverse order of disassembly. |
| Inspection |
| 1. |
Check the hub for cracks and the splines for wear. |
| 2. |
Check the brake disc for scoring and damage. |
| 3. |
Check the knuckle for cracks |
| 4. |
Check the bearing for cracks or damage. |
 Front Hub / Knuckle / Tone Wheel Components and Components Location
Components
1. Knuckle 2. Dust cover3. Hub assembly4. Brake disc
...

Other Information:
Repair procedures
Replacement
1.
Remove the cap (A), the nuts and the wiper arm (B).
Tightening torque :
22.6 ~ 26.5 N.m(2.3 ~ 2.7 kgf.m, 16.6 ~ 19.5 lb-ft)
2.
Disconnect the cowl top cover nozzle hose (A ...
Specifications
Specifications
ItemSpecificationFront/Rear parking assist system control unitRated voltageDC 12VOperation range40~120 cm (15.7~47.2 in)Operation voltageDC 9V~16VOperation currentMax. 300 mAOperat ...
Categories
- Home
- First Generation
- Second Generation
- Third generation
- Kia Sedona YP 2014-2026 Owners Manual
- Kia Sedona YP 2014-2026 Service Manual

Copyright © www.kisedona.com 2016-2026