 Kia Sedona: TPMS Sensor Repair procedures
Third generation YP (2014-2026) / Kia Sedona YP Service Manual / Suspension System / Tire Pressure Monitoring System / TPMS Sensor Repair procedures
| Removal |
| 1. |
Remove the tire.
(Refer to Tires/Wheels - "Tire") |
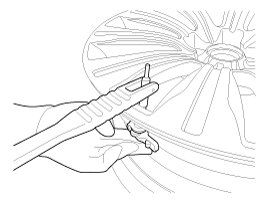
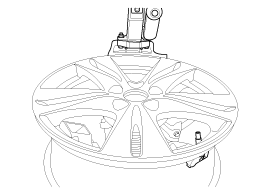
| 2. |
Remove the screw with torx driver (A).
|

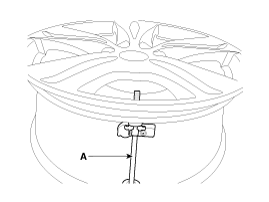
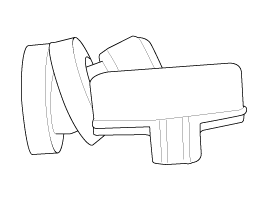
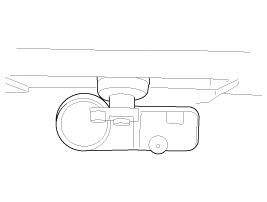
| 3. |
Remove the sensor body (A) from the valve (B) in the direction of the arrow.
|
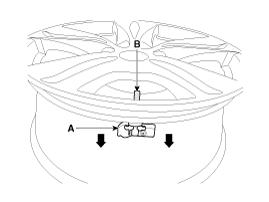
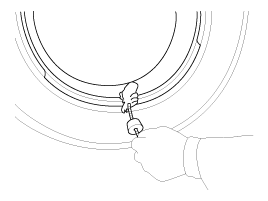
| 4. |
Use the valve mounting tool to pull out the valve until it is entirely out of the lower hole.
|

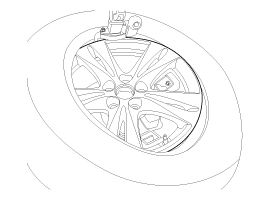
| 5. |
Apply lubricant to the surface of the valve, and then mount it through the valve hole of the wheel.
|
| 6. |
Apply soapy water or lubricant to the upper/lower bead section of the tire.
|
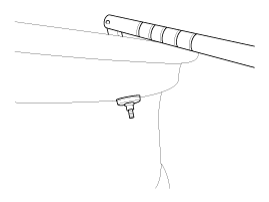
| 7. |
In order to mount the lower beads, place the TPMS sensor at 5
o''clock, starting from the head of the tire replacement equipment.
|
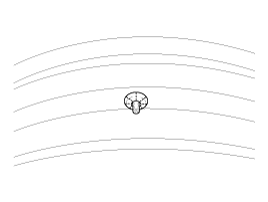
| 8. |
Rotate the rim clockwise and press tire towards 3 o''clock to mount the lower beads.
|

| 9. |
In order to mount the upper beads, press the tire towards 3 o''clock and turn the rim clockwise.
|
| 10. |
Inject air into the tire until the beads are in the correct position.
|

| 11. |
Adjust the tire pressure according to the recommended tire pressure for the vehicle. |
| 12. |
If the TPMS sensor malfunctions, the TPMS sensor learning
must be performed. Replace any faulty sensors and perform TPMS sensor
learning. |
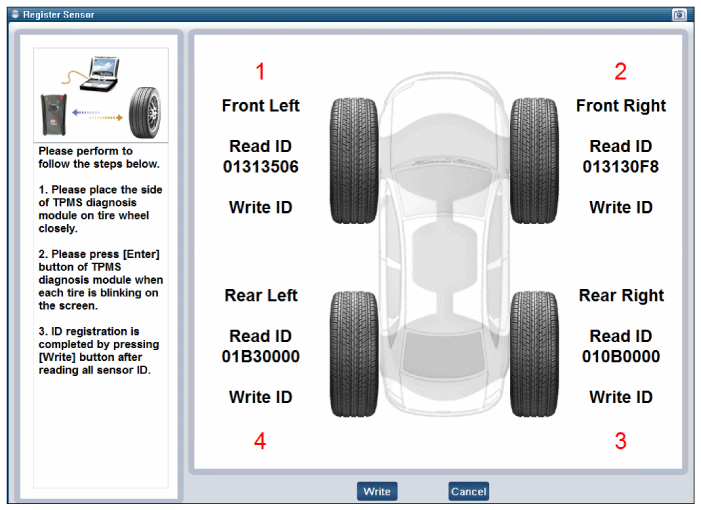
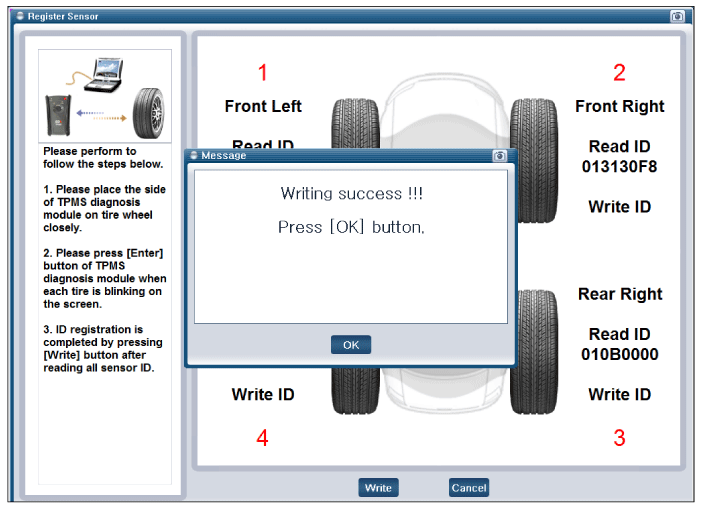
| Diagnosis procedure using GDS |
To give guidance for diagnosing using diagnosis device, refer to the following:
| 1. |
Connect self-diagnosis connector (16 pins) located in the
lower driver side crash pad to self-diagnosis device, and then turn on
the self-diagnosis device after key is ON. |
| 2. |
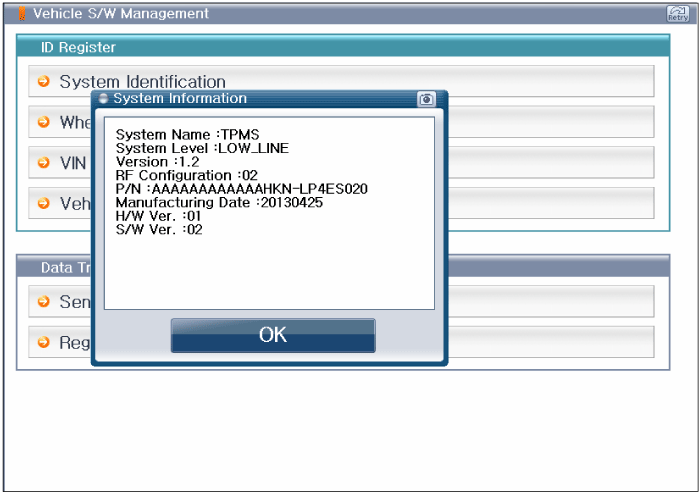
Select the "vehicle model" and "TPMS" on GDS vehicle selection screen, then select OK. |
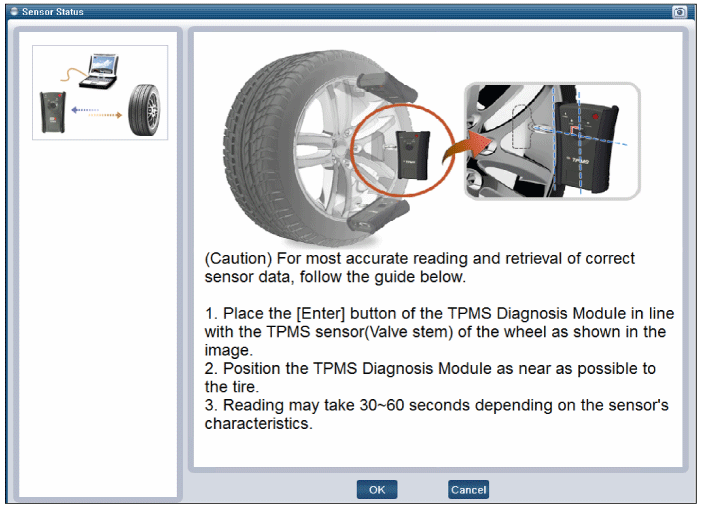
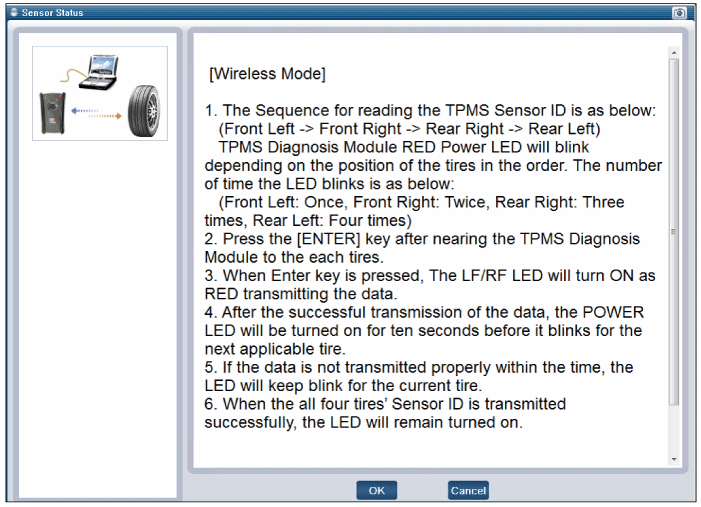
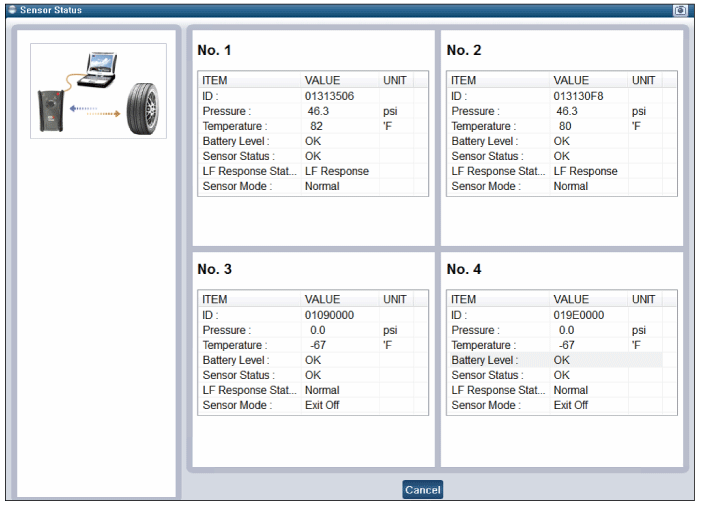
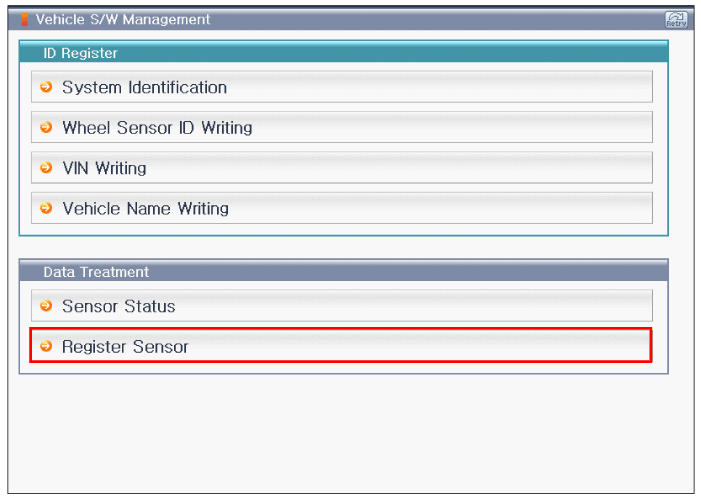
[System Identification (Wireless)]
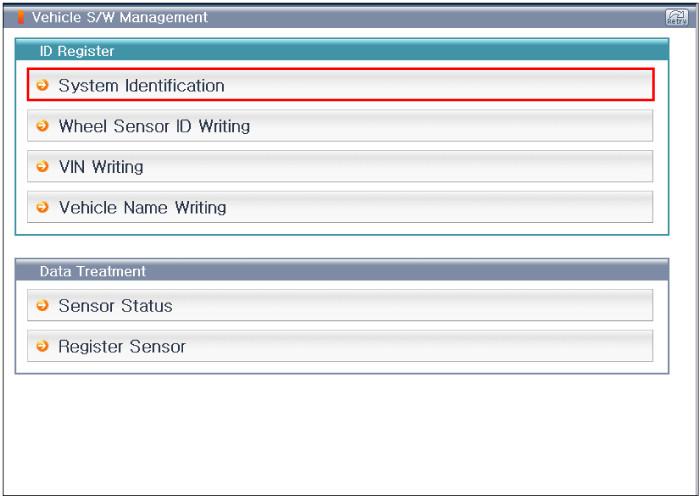
[Sensor ID Writing (Wireless)]

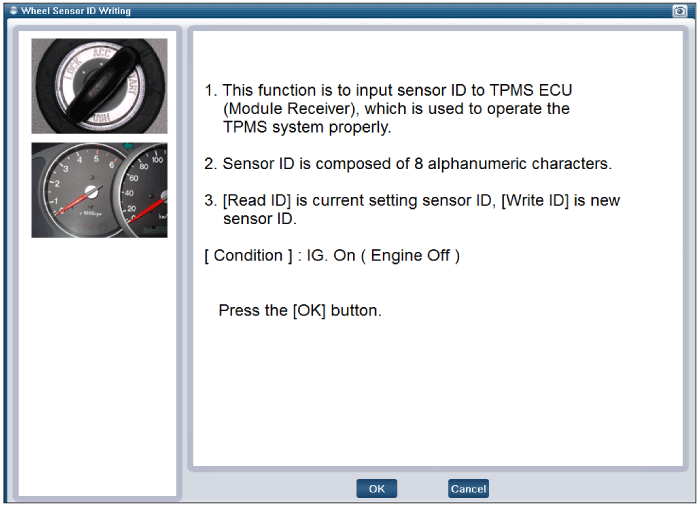
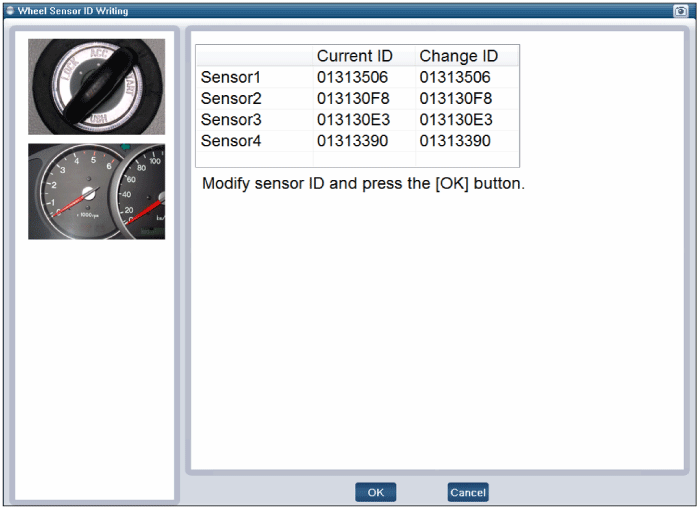

[VIN input initialization]
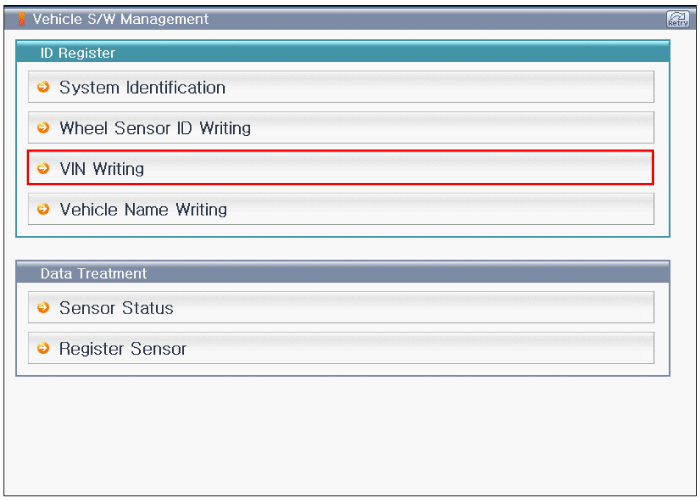
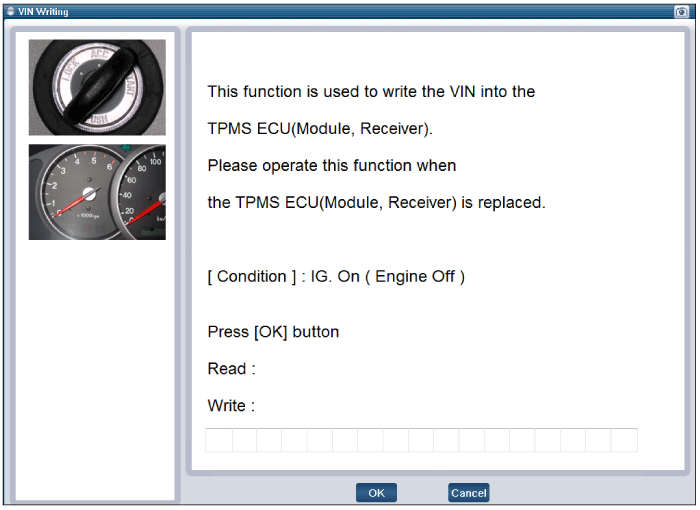
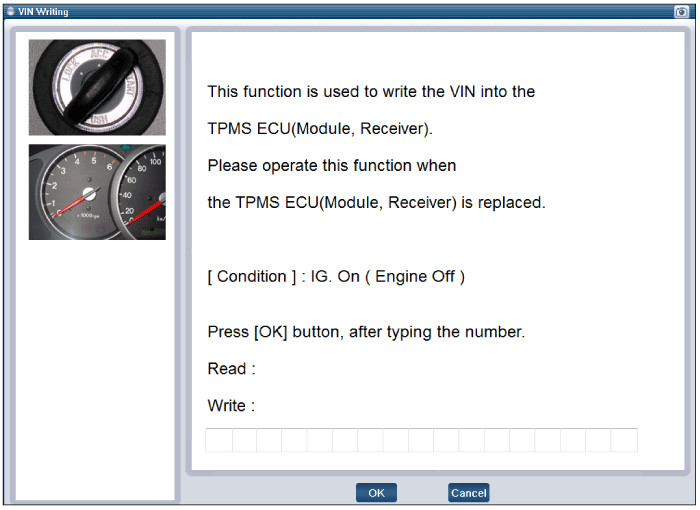

[Vehicle name input initialization]
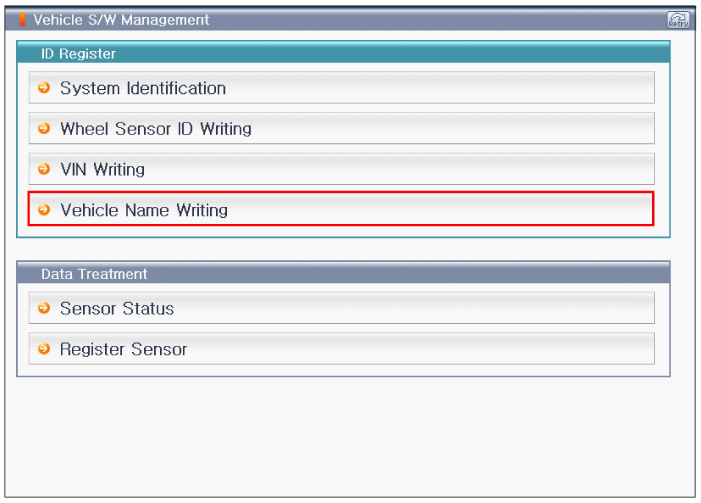
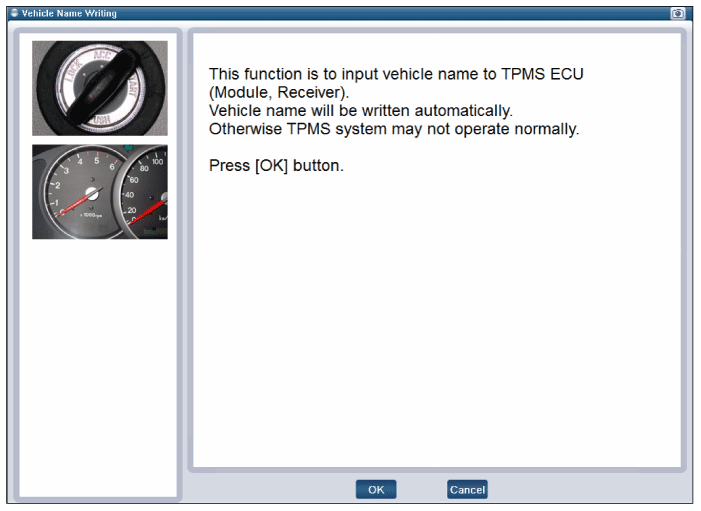
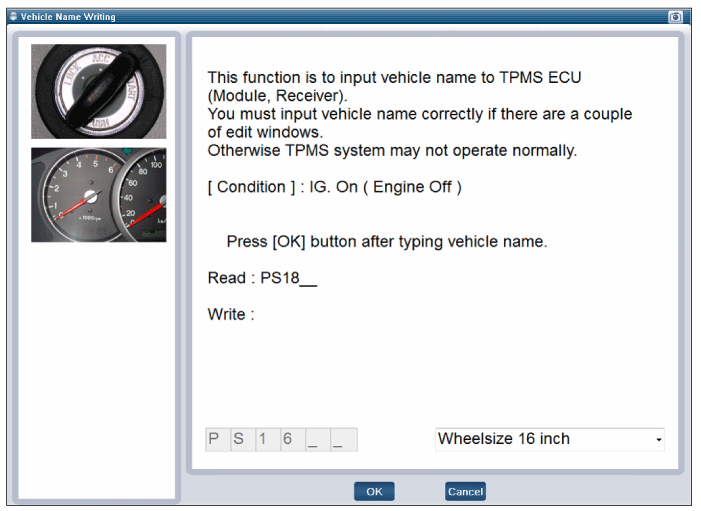
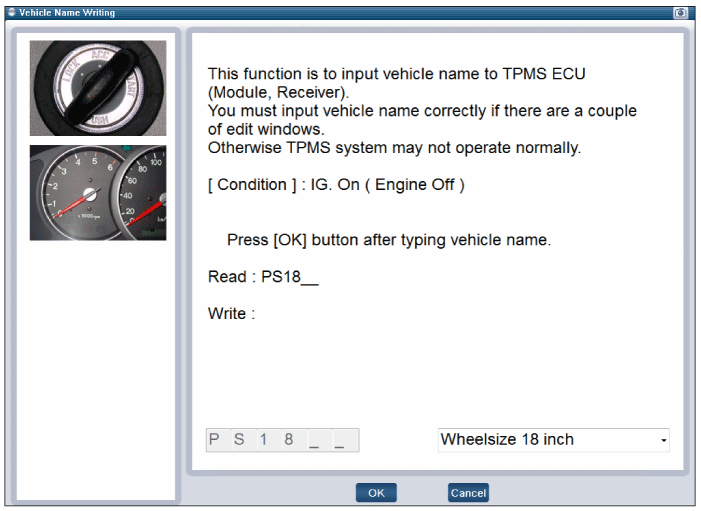
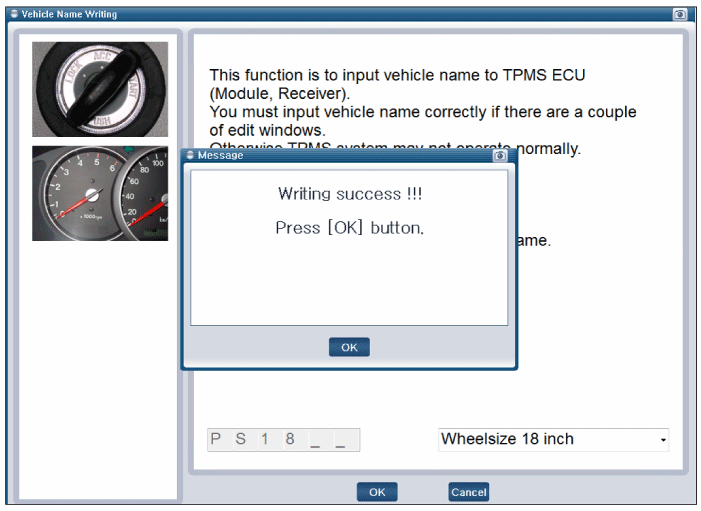
[Sensor Status initialization]

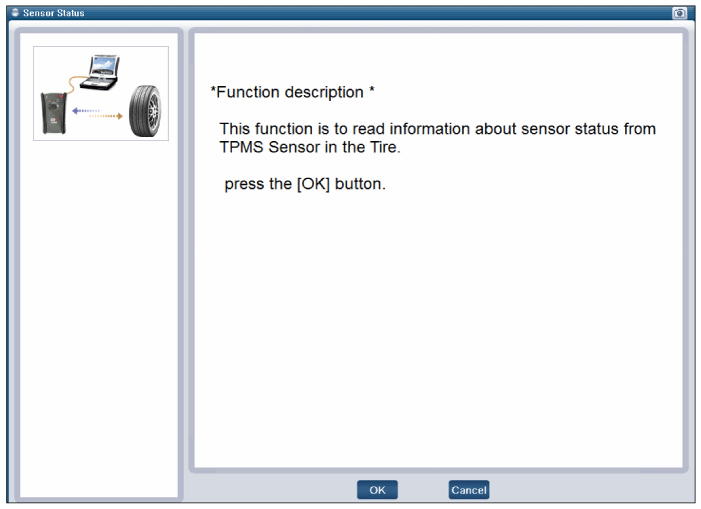
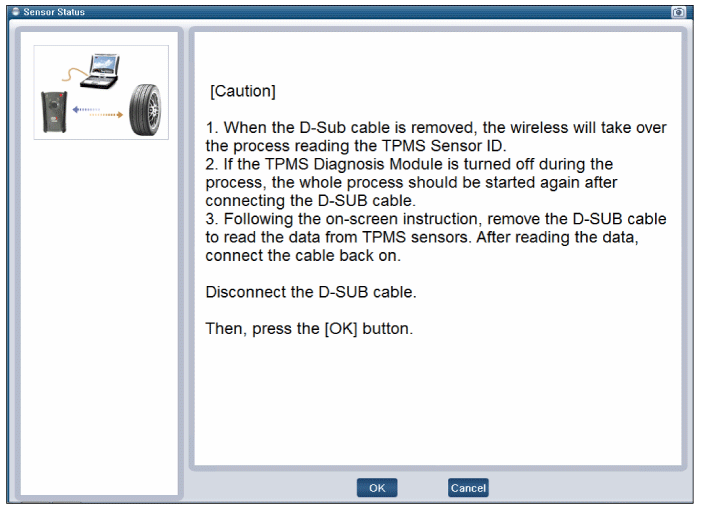
[Register Sensor initialization]
|
 TPMS Sensor Description and Operation
Description
1.
Function
•
By detecting the pressure, temperature, acceleration, and battery condition, transmit information to ECU by a wireless RF.
•
2.
Structure and f ...
 TPMS Receiver Description and Operation
Description
1.
Mode
(1)
Virgin State
•
The receiver as a sole part is shipped in this state. Replacement parts should therefore arrive in this state.
•
In this state, there ...
Other Information:
Evaporator Temperature Sensor Repair procedures
Inspection
1.
Turn the ignition switch OFF.
2.
Disconnect the evaporator temperature sensor connector.
3.
Measure resistance between terminals “+” and “-” of the evaporator tempera ...
Seatback pocket
The seatback pocket is provided on the back of the front passenger ...
Categories
- Home
- First Generation
- Second Generation
- Third generation
- Kia Sedona YP 2014-2026 Owners Manual
- Kia Sedona YP 2014-2026 Service Manual

Copyright © www.kisedona.com 2016-2026