 Kia Sedona: Timing Chain Cover Repair procedures
Third generation YP (2014-2025) / Kia Sedona YP Service Manual / Engine Mechanical System / Timing System / Timing Chain Cover Repair procedures
| Removal |
When removing the high pressure fuel pump, high pressure fuel
pipe, delivery pipe, and injector, there may be injury caused by
leakage of high pressure fuel. Therefore, do not attempt repairing
immediately after the engine stops. |
|
Mark all wiring and hoses to avoid misconnection. |
| 1. |
Remove the engine cover.
(Refer to Engine And Transaxle Assembly - "Engine Cover") |
| 2. |
Remove the air duct.
(Refer to Intake And Exhaust System - "Air Cleaner") |
| 3. |
Remove the battery.
(Refer to Engine Electrical System - "Battery") |
| 4. |
Remove the engine room under cover and engine room RH side cover.
(Refer to Engine And Transaxle Assembly - "Engine Room Under Cover") |
| 5. |
Drain the engine coolant.
(Refer to Cooling System - "Coolant") |
| 6. |
Drain the engine oil.
(Refer to Lubrication System - "Engine Oil") |
| 7. |
Remove the air cleaner assembly.
(Refer to Intake And Exhaust System - "Air Cleaner") |
| 8. |
Remove the surge tank.
(Refer to Intake And Exhaust System - "Surge Tank") |
| 9. |
Remove the intake manifold.
(Refer to Intake And Exhaust System - "Intake Manifold") |
| 10. |
Remove the LH/RH cylinder head cover.
(Refer to Cylinder Head Assembly - "Cylinder Head Cover") |
| 11. |
Remove the drive belt.
(Refer to Timing System - "Drive Belt") |
| 12. |
Remove the idler.
(Refer to Timing System - "Idler") |
| 13. |
Remove the drive belt tensioner.
(Refer to Timing System - "Drive Belt Tensioner") |
| 14. |
Remove the crankshaft damper pulley.
(Refer to Timing System - "Crankshaft Damper Pulley") |
| 15. |
Remove the water pump.
(Refer to Cooling System - "Water Pump") |
| 16. |
Remove the lower oil pan.
(Refer to Lubrication System - "Oil Pan") |
| 17. |
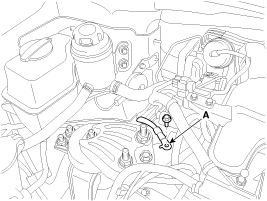
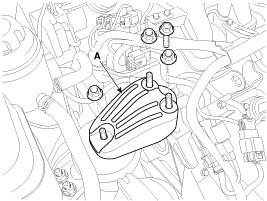
Remove the engine mounting bracket.
|
| 18. |
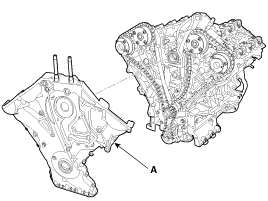
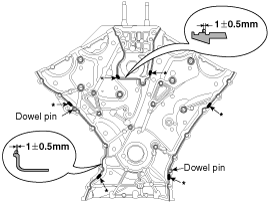
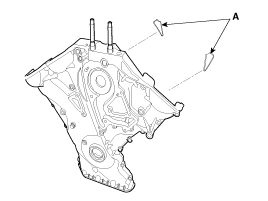
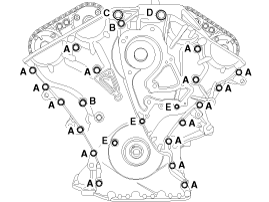
Remove the timing chain cover (A).
|
| Installation |
| 1. |
Install the timing chain cover.
|
| 2. |
Install the other parts in the reverse order of removal.
|
 Timing Chain Cover Components and Components Location
Components
1. Timing chain cover2. Gasket
...
 Timing Chain Components and Components Location
Components
1. Oil pump chain cover2. Oil pump sprocket3. Oil pump chain 4. Oil pump tensioner assembly5. Crankshaft oil pump sprocket6. Crankshaft RH chain sprocket7. RH Timing chain auto tension ...
Other Information:
Description
On this mode, you can change setting of the doors, lights, and so on. ...
From the front seat
1. Set the rear climate control selection (REAR ON) button in the front climate
control panel to the ON position.
2. Set the rear fan speed control knob in the front climate control panel to
the ...
Categories
- Home
- First Generation
- Second Generation
- Third generation
- Kia Sedona YP 2014-2025 Owners Manual
- Kia Sedona YP 2014-2025 Service Manual
Copyright © www.kisedona.com 2016-2025


