 Kia Sedona: Muffler Repair procedures
Third generation YP (2014-2026) / Kia Sedona YP Service Manual / Engine Mechanical System / Intake And Exhaust System / Muffler Repair procedures
| Removal and Installation |
Front Muffler
| 1. |
Remove the engine room under cover.
(Refer to Engine and Transaxle Assembly - "Engine Room Under Cover") |
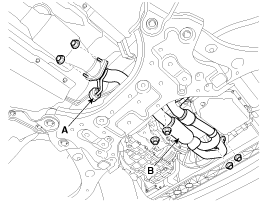
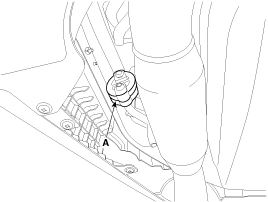
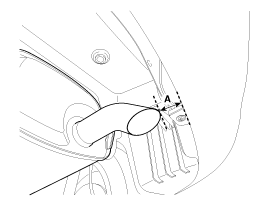
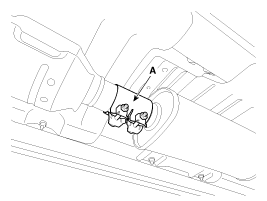
| 2. |
Disconnect the RH rear oxygen sensor (HO2S) connector (A).
|

| 3. |
Disconnect the LH rear oxygen sensor (HO2S) connector (A).
|

| 4. |
Remove the front muffler hanger (A) and then remove the front muffler (B).
|
| 5. |
Install in the reverse order of removal.
|

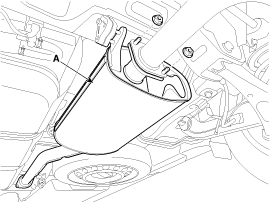
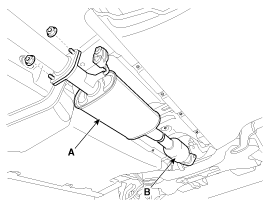
Catalytic converter & Center Muffler Assembly
| 1. |
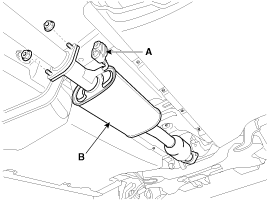
Remove the hanger (A) from the catalytic converter & center muffler assembly. |
| 2. |
Remove the catalytic converter & center muffler assembly (B).
|
| 3. |
Install in the reverse order of removal.
|
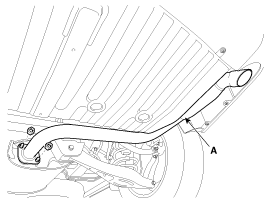
Rear Muffler
| 1. |
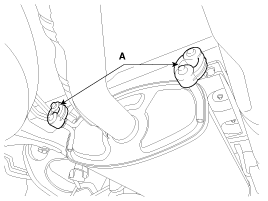
Remove the hanger (A) from the rear muffler.
|
| 2. |
Remove the rear muffler (A).
|
| 3. |
Install in the reverse order of removal.
|
Tail Muffler
| 1. |
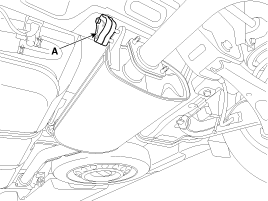
Remove the hanger (A) from the tail muffler.
|
| 2. |
Remove the tail muffler (A).
|
| 3. |
Install in the reverse order of removal.
|
Replacement procedure of catalytic converter & center muffler assembly using clamp
Under warranty : Replace the catalytic converter & center muffler assembly.
Out of warranty : Catalytuc converters and center muffler assemblies can be replaced in the following procedure:
| 1. |
Check if the clamping part of the catalytic converter & center muffler assembly is damaged or deformed.
If the muffler is too corroded to clamp, replace the catalytic converter & center muffler assembly.
|
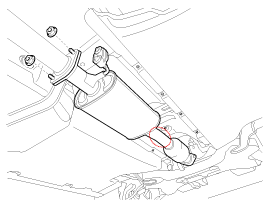
| 2. |
Record the gap (A) between the tail pipe and the rear bumper.
|
| 3. |
Remove the hanger (A) from catalytic converter & center muffler assembly. |
| 4. |
Remove the catalytic converter & center muffler assembly (B).
|
| 5. |
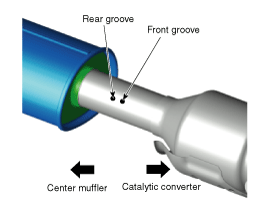
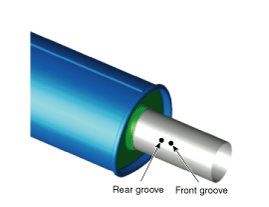
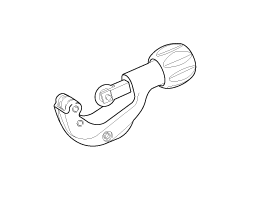
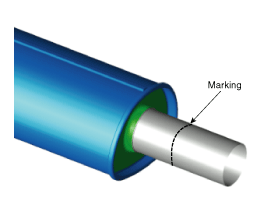
Cut the catalytic converter & center muffler assembly as in the instruction below.
[Replacement muffler]
|

| 6. |
Install the center muffler.
|
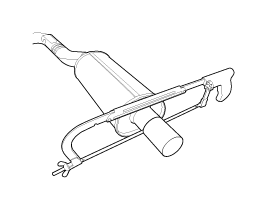
 Muffler Components and Components Location
Components
1. Gasket2. Hanger3. Front muffler4. Catalytic converter & Center muffler assembly5. Rear muffler6. Tail muffler
...

Other Information:
Components and Components Location
Component Location
1. Fender assembly
...
Left or Right power sliding door opening or closing
This function will be operated when the power door ON/OFF button is ON (not depressed).
Using the power sliding door handle
1. Carry the smart key.
2. Pull the power sliding door handle once.
3. T ...
Categories
- Home
- First Generation
- Second Generation
- Third generation
- Kia Sedona YP 2014-2026 Owners Manual
- Kia Sedona YP 2014-2026 Service Manual

Copyright © www.kisedona.com 2016-2026