 Kia Sedona: Power Seat Motor Repair procedures
Third generation YP (2014-2025) / Kia Sedona YP Service Manual / Body Electrical System / Seat Electrical / Power Seat Motor Repair procedures
| Inspection |
Diagnosis With GDS
| 1. |
The body electrical system can be quickly diagnosed for faulty parts using vehicle diagnostic system (GDS).
The diagnostic system (GDS) provides the following information:
|
| 2. |
Select the ''Car model'' and the system to be checked in order to check the vehicle with the tester. |
| 3. |
Select the ''Power seat module (PSM)'' to check the power seat module (PSM). |
| 4. |
Select the ''Current Data" menu to search the current state of the input/output data.
The input/output data for the sensors corresponding to the power seat module (PSM) can be checked. |
| 5. |
If you wish to check the power door lock operation by force, select "Actuation test". |
Power Seat Motor
| 1. |
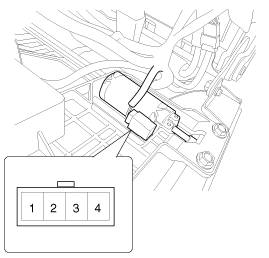
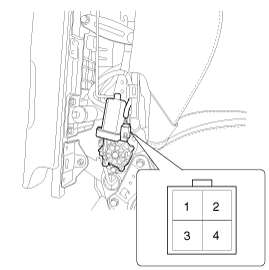
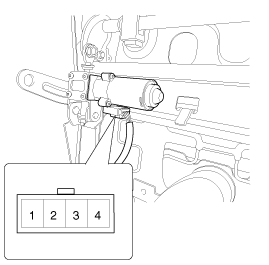
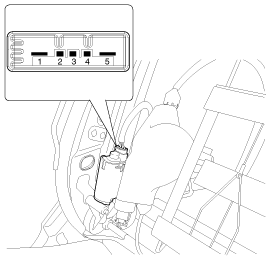
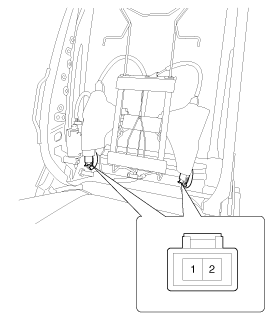
Disconnect the connectors for each motor.
[Slide motor]
[Rear height motor]
[Front height motor]
[Reclining motor]
[Lumbar support motor]
|
| 2. |
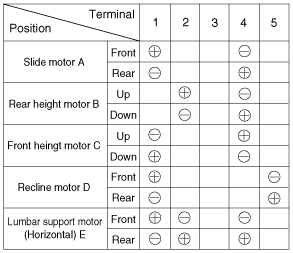
With the battery connected directly to the motor terminals, check if the motors run smoothly. |
| 3. |
Reverse the connections and check that the motor turns in reverse. |
| 4. |
If there is an abnormality, replace the motors.
[Driver / Assist]
|
| Removal |
| 1. |
Disconnect the negative (-) battery terminal. |
| 2. |
Remove the front seat assembly.
(Refer to Body - "Front Seat Assembly") |
| Installation |
| 1. |
Install the front seat assembly. |
| 2. |
Connect the negative (-) battery terminal. |
 Components and Components Location
Component Location
1. Front tilt motor2. Slide motor3. Rear height motor4. Reclining motor5. Lumbar support motor (Vertical)6. Seat cushion switch7. Seat back switch8. Lumbar support switch
...
 Power Seat Control Switch Schematic Diagrams
Circuit Diagram
...
Other Information:
IMS (Integrated Memory System) module Repair procedures
Removal
1.
Disconnect the negative (-) battery terminal.
2.
Remove the driver''s seat assembly.
(Refer to Body - "Front Seat Assembly")
3.
Loosening the IMS unit mounting screws (A).
4 ...
Knock Sensor (KS) Specifications
Specification
ItemSpecificationCapacitance (pF)950 ~ 1,350Resistance (MΩ)4.87
...
Categories
- Home
- First Generation
- Second Generation
- Third generation
- Kia Sedona YP 2014-2025 Owners Manual
- Kia Sedona YP 2014-2025 Service Manual
Copyright В© www.kisedona.com 2016-2025

