
 Kia Sedona: Rear Seat Assembly Repair procedures
Third generation YP (2014-2026) / Kia Sedona YP Service Manual / Body (Interior and Exterior) / Rear Seat / Rear Seat Assembly Repair procedures
| Replacement |
[Second row seat assembly]
| [7Seat/8Seat] |
| 1. |
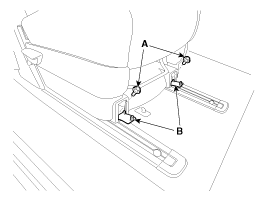
Loosen the second row seat front mounting bolts (A) after opening the cap (B).
|
| 2. |
Pull up the seat by pulling the stand-up lever. |
| 3. |
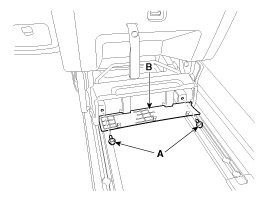
Loosen the second row seat rear mounting bolts (A) after opening the cap (B).
|
| 4. |
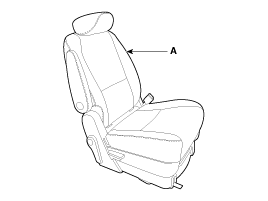
Remove the second row seat assembly (A).
|
| 5. |
Install in the reverse order of removal. |
| [Leg support type] |
| 1. |
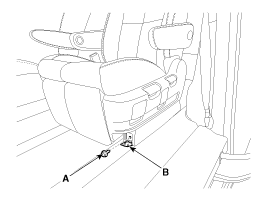
Loosen the seat front mounting bolts (A) after opening the cap (B).
[LH]
|
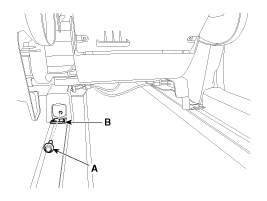
| 2. |
Pull up the seat by pulling the stand-up lever. |
| 3. |
Loosen the seat rear mounting bolts (A) after opening the cap (B).
|
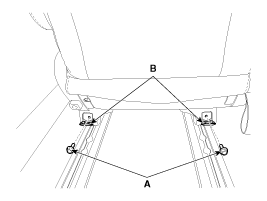
| 4. |
Remove the second row seat assembly (A).
|
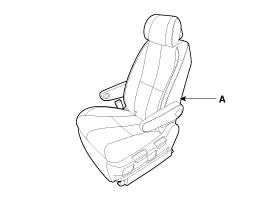
| 5. |
Install in the reverse order of removal. |
[Second row center seat assembly]
| 1. |
Tumble the second row center seat assembly (B) after pulling the lever (A).
|
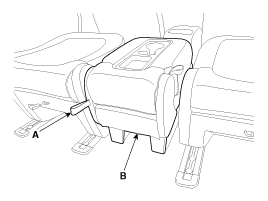
| 2. |
Remove the second row center seat assembly (B) after pulling the lever (A) in the direction of arrow.
|
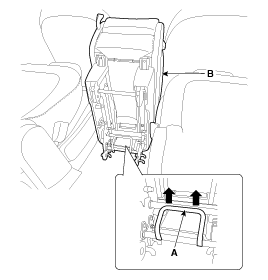
| 3. |
Install in the reverse order of removal. |
[Third row seat assembly]
| 1. |
Using a screwdriver or remover, remove the third row seat leg cover (A).
|
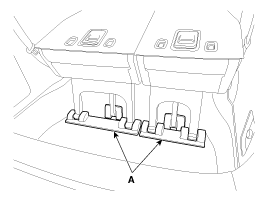
| 2. |
Remove the third row seat assembly (A) after loosening the bolts and nuts.
|
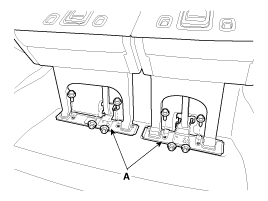
| 3. |
Install in the reverse order of removal. |
 Rear Seat Assembly Components and Components Location
Component Location
[Second Row Seat Assembly]
1. Second Row Seat Assembly [RH]2. Second Row Center Seat Assembly3. Second Row Seat Assembly [LH]
1. Second Row Seat Assembly
[Third ...
 Rear Seat Back Cover Components and Components Location
Component Location
[Second Row Seat Assembly]
1. Second Row Seat Back Cover [RH]2. Second Row Center Seat Back Cover3. Second Row Seat Back Cover [LH]
1. Second Row Seat Back Cover
...
Other Information:
Rear Wheel Speed Sensor Components and Components Location
Components
1. Rear wheel speed sensor 2. Rear wheel speed sensor cable
...
Description
On this mode, you can change setting of the doors, lights, and so on. ...
Categories
- Home
- First Generation
- Second Generation
- Third generation
- Kia Sedona YP 2014-2026 Owners Manual
- Kia Sedona YP 2014-2026 Service Manual

Copyright © www.kisedona.com 2016-2026