 Kia Sedona: Center Pillar Trim Repair procedures
Third generation YP (2014-2026) / Kia Sedona YP Service Manual / Body (Interior and Exterior) / Interior Trim / Center Pillar Trim Repair procedures
| Replacement |
[Center pillar lower trim]
|

Take care not to bend or scratch the trim and panels. |

| 1. |
Remove the front door scuff trim.
(Refer to Interior Trim - "Door Scuff Trim") |
| 2. |
Remove the rear door scuff trim.
(Refer to Interior Trim - "Door Scuff Trim") |
| 3. |
Remove the front door body side weatherstrip. |
| 4. |
Remove the rear door body side weatherstrip. |
| 5. |
Disconnect the front seat belt anchor pretensioner and seat belt anchor.
|
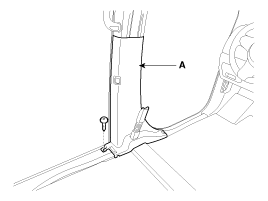
| 6. |
Remove the center piller lower trim (A) after loosening the screws.
|
| 7. |
Disconnect the power sliding door switch connector (A).
|
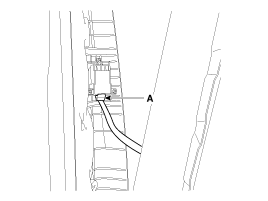
| 8. |
Install in the reverse order of removal. |
[Center pillar upper trim]
|
Take care not to bend or scratch the trim and panels. |
| 1. |
Remove the center piller lower trim. |
| 2. |
Open the cap, and then remove the center pillar assist handle (A) after loosening the screws.
|
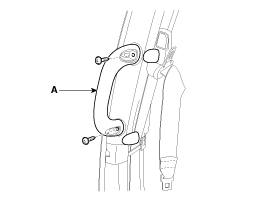
| 3. |
Remove the front seat belt upper anchor cover (A) using a screwdriver or remover.
|

| 4. |
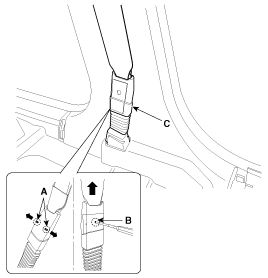
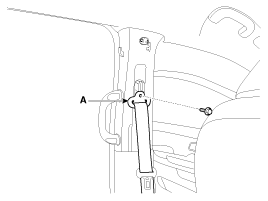
Remove the front seat belt upper anchor (A) after loosening the mounting bolt.
|
| 5. |
Remove the center piller upper trim (A) after loosening the mounting bolt.
|

| 6. |
Install in the reverse order of removal.
|

 Center Pillar Trim Components and Components Location
Component Location
1. Center pillar lower trim2. Center pillar upper trim
...
 Rear Transverse Trim Components and Components Location
Component Location
1. Rear transverse trim
...
Other Information:
Components and Components Location
Component Location
1. Head lamp leveling actuator (Built-in Head lamp)2. Head lamp leveling unit (Rear right only)
...
Checking the brake fluid level
Check the fluid level in the reservoir periodically. The fluid level should be
between MAX (Maximum) and MIN (Minimum) marks on the side of the reservoir.
Before removing the reservoir cap and ad ...
Categories
- Home
- First Generation
- Second Generation
- Third generation
- Kia Sedona YP 2014-2026 Owners Manual
- Kia Sedona YP 2014-2026 Service Manual

Copyright © www.kisedona.com 2016-2026