 Kia Sedona: Cowl Side Trim Repair procedures
Third generation YP (2014-2025) / Kia Sedona YP Service Manual / Body (Interior and Exterior) / Interior Trim / Cowl Side Trim Repair procedures
| Replacement |
|
Take care not to bend or scratch the trim and panels. |
| [LH] |
| 1. |
Remove the front door scuff trim.
(Refer to Interior Trim - "Door Scuff Trim") |
| 2. |
Remove the hood latch release handle.
(Refer to Hood - "Hood Latch Release Handle") |
| 3. |
Remove the front door body side weatherstrip. |
| 4. |
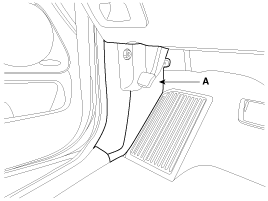
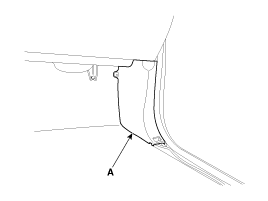
Using a screwdriver or remover, remove the cowl side trim (A).
|
| 5. |
Install in the reverse order of removal.
|
| [RH] |
| 1. |
Remove the front door scuff trim.
(Refer to Interior Trim - "Door Scuff Trim") |
| 2. |
Slighty remove the front door body side weatherstrip. |
| 3. |
Using a screwdriver or remover, remove the cowl side trim (A).
|
| 4. |
Install in the reverse order of removal. |
 Cowl Side Trim Components and Components Location
Component Location
1. Cowl side trim
...
 Front Pillar Trim Components and Components Location
Component Location
1. Front pillar trim
...
Other Information:
SS-B Solenoid Valve(ON/OFF) Specifications
Specification
ItemSpecificationControl typeON/OFFCurrent value (mA)5.0 Coil resistance(Ω)10 ~ 11
...
Blade replacement
When the wipers no longer clean adequately, the blades may be worn or cracked,
and require replacement.
To prevent damage to the wiper arms or other components, do not attempt to move
the wipers ...
Categories
- Home
- First Generation
- Second Generation
- Third generation
- Kia Sedona YP 2014-2025 Owners Manual
- Kia Sedona YP 2014-2025 Service Manual
Copyright © www.kisedona.com 2016-2025


