
 Kia Sedona: Floor Console Assembly Repair procedures
Third generation YP (2014-2026) / Kia Sedona YP Service Manual / Body (Interior and Exterior) / Floor Console / Floor Console Assembly Repair procedures
| Replacement |
Put on gloves to protect your hands. |

|

| 1. |
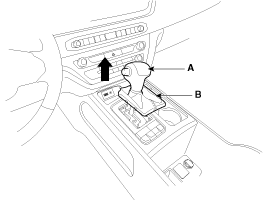
To remove the gear knob (A) and gear boots (B), pull them up altogether.
|
| 2. |
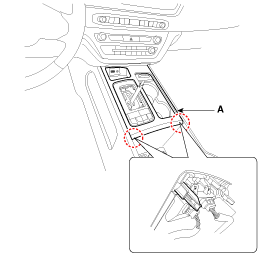
Using a screwdriver or remover, remove the floor console upper cover (A).
|
| 3. |
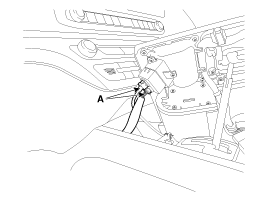
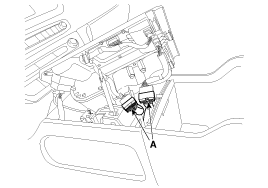
Disconnect the connectors (A) from the floor console upper cover.
|
| 4. |
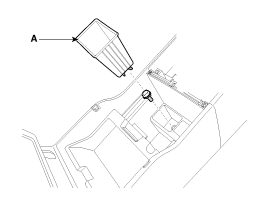
Remove the sunglasses case (A) and then loosen the bolt.
|
| 5. |
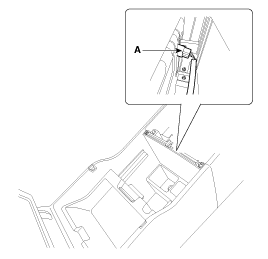
Loosen the screw and disconnect the console main connector (A).
|
| 6. |
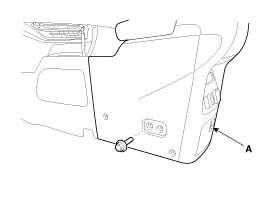
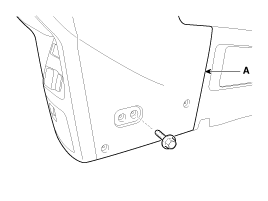
Loosen the mounting bolts and remove the console assembly (A).
[LH]
[RH]
|
| 7. |
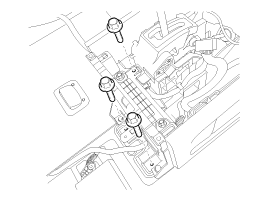
Loosen the console mounting bolts.
|
| 8. |
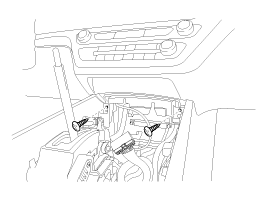
Loosen the console mounting screws.
|
| 9. |
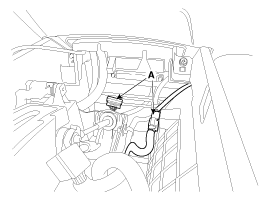
Disconnect the floor console connector (A).
|
| 10. |
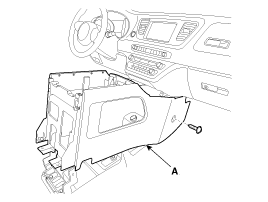
After loosening the mounting screws and bolts, remove the floor console assembly (A).
|
| 11. |
Install in the reverse order of removal.
|

 Floor Console Assembly Components and Components Location
Component Location
1. Floor console assembly
...
 Rear Console Cover Components and Components Location
Component Location
1. Rear console cover
...
Other Information:
Glove box
The glove box can be locked and unlocked with a master key. (if equipped)
To open the glove box, pull the handle and the glove box will automatically open.
Close the glove box after use.
WAR ...
Temperature control
The temperature will increase to the maximum (HI) by turning the knob to the
extreme right.
The temperature will decrease to the minimum (Lo) by turning the knob to the
extreme left.
When turn ...
Categories
- Home
- First Generation
- Second Generation
- Third generation
- Kia Sedona YP 2014-2026 Owners Manual
- Kia Sedona YP 2014-2026 Service Manual

Copyright © www.kisedona.com 2016-2026