 Kia Sedona: Power Sliding Door (PSD) Drive Unit Repair procedures
Third generation YP (2014-2025) / Kia Sedona YP Service Manual / Body Electrical System / Power Sliding Door System / Power Sliding Door (PSD) Drive Unit Repair procedures
| Removal |
|
[LH]
| 1. |
Disconnect the negative (-) battery terminal. |
| 2. |
Remove the rear combination lamp.
(Refer to Lighting System - "Rear Combination Lamp") |
| 3. |
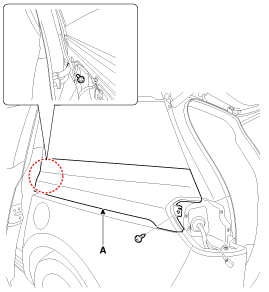
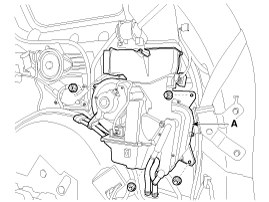
Loosen the mounting screws and then remove the center rail cover (A) by using a screwdriver or panel remover.
|
| 4. |
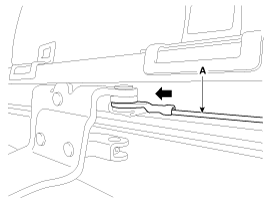
Pull the rear cable (A) in the direction of the arrow.
|
| 5. |
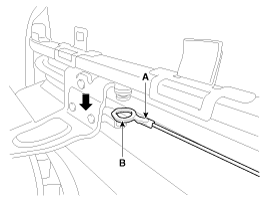
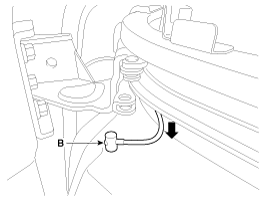
Remove the rear cable (A) after falling down the cable end (B) in the direction of the arrow.
|
| 6. |
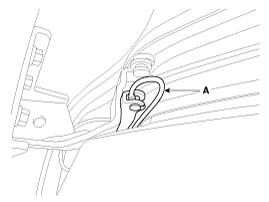
Remove the front cable (A) from the center roller hinge (B).
|
| 7. |
Remove the luggage side trim [LH].
(Refer to Body - "Luggage Side Trim") |
| 8. |
Remove the sub woofer speaker.
(Refer to AUDIO or AVN System - "Speaker") |
| 9. |
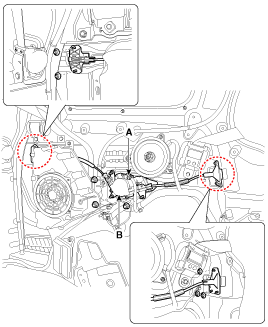
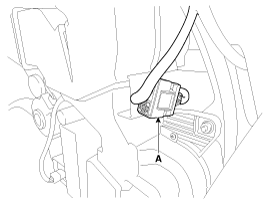
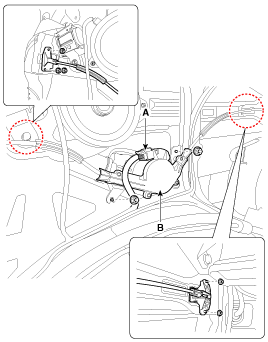
Disconnect the connector (A) and then remove the power sliding door drive unit (B) after loosening the nuts.
|
[RH]
| 1. |
Disconnect the negative (-) battery terminal. |
| 2. |
Remove the rear combination lamp.
(Refer to Lighting System - "Rear Combination Lamp") |
| 3. |
Loosen the mounting screws and then remove the center rail cover (A) by using a screwdriver or panel remover.
|
| 4. |
Pull the rear cable (A) in the direction of the arrow.
|
| 5. |
Remove the rear cable (A) after falling down the cable end (B) in the direction of the arrow.
|
| 6. |
Remove the front cable (A) from the center roller hinge (B).
|
| 7. |
Remove the tail gate pillar trim [RH].
(Refer to Body - "Rear Pillar Trim") |
| 8. |
Remove the luggage side trim [RH].
(Refer to Body - "Luggage Side Trim") |
| 9. |
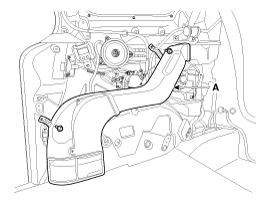
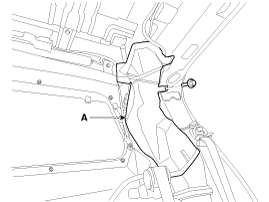
Remove the rear heater duct (A) after loosening the bolts.
|
| 10. |
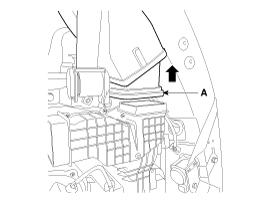
Pull up the bottom of rear A/C duct (A).
|
| 11. |
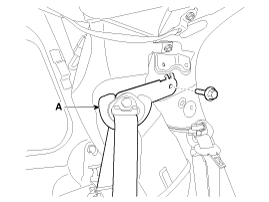
Remove the third row seat belt upper anchor (A) after loosening the bolt.
|
| 12. |
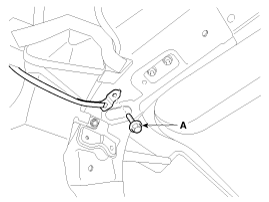
Loosen the mounting bolt (A).
|
| 13. |
Remove the rear A/C duct (A) after loosening the bolt.
|
| 14. |
Disconnect the rear heater main connector.
|
| 15. |
Separate the rear Heater & A/C unit (A) after loosening the nut.
|
| 16. |
Disconnect the connector (A) and then remove the power sliding door drive unit (B) after loosening the nuts.
|
| Installation |
[LH]
| 1. |
Install the power sliding door drive unit after connecting the connector.
|
| 2. |
Install the sub woofer speaker. |
| 3. |
Install the luggage side trim [LH]. |
| 4. |
Install the front, rear cable. |
| 5. |
Install the center rail cover. |
| 6. |
Install the rear combination lamp. |
| 7. |
Connect the negative (-) battery terminal. |
[RH]
| 1. |
Install the power sliding door drive unit after connecting the connector.
|
| 2. |
Install the rear heater & A/C unit. |
| 3. |
Connect the rear heater main connector. |
| 4. |
Install the rear A/C duct. |
| 5. |
Install the third row seat belt upper anchor.
|
| 6. |
Install the heater duct. |
| 7. |
Install the luggage side trim [RH]. |
| 8. |
Install the tail gate pillar trim [RH]. |
| 9. |
Install the front, rear cable. |
| 10. |
Install the center rail cover. |
| 11. |
Install the rear combination lamp. |
| 12. |
Connect the negative (-) battery terminal.
|
 Troubleshooting
Failure Check-up Elements
The following is to be checked before inspecting the Power Sliding Door system parts.
1.
Manual operation
Check if the sliding door operates manually. Shift to ''OFF''
...
 Power Sliding Door (PSD) Control Module Components and Components Location
Components
Connector Pin Information
No.Connector AConnector BConnector CConnector D1-Detent Switch (Left side)Clutch Return (Left side)Logic battery 2-Child Safety Lock Switch (Left side)Quad S ...
Other Information:
Torque Converter Control Solenoid Valve (T/CON_VFS) Description and Operation
Description
•
Torque converter control solenoid valve is a Variable Force Solenoid (VFS) type.
•
When TCM supplies variable current to solenoid valve,
hydraulic pressure of t ...
Rear Door Belt Inside Weatherstrip Repair procedures
Replacement
1.
Remove the rear door trim.
(Refer to Rear Door - "Rear Door Trim")
2.
Remove the rear door belt inside weatherstrip (A).
3.
Install in the reverse order of removal.
...
Categories
- Home
- First Generation
- Second Generation
- Third generation
- Kia Sedona YP 2014-2025 Owners Manual
- Kia Sedona YP 2014-2025 Service Manual
Copyright © www.kisedona.com 2016-2025


