
 Kia Sedona: Intake Manifold Repair procedures
Third generation YP (2014-2026) / Kia Sedona YP Service Manual / Engine Mechanical System / Intake And Exhaust System / Intake Manifold Repair procedures
| Removal and Installation |
| 1. |
Remove the engine cover.
(Refer to Engine and Transaxle Assembly - "Engine Cover") |
| 2. |
Remove the engine room under cover.
(Refer to Engine and Transaxle Assembly - "Engine Room Under Cover") |
| 3. |
Drain the engine coolant.
(Refer to Cooling System - "Coolant") |
| 4. |
Remove the air duct.
(Refer to Intake And Exhaust System - "Air Cleaner") |
| 5. |
Remove the battery.
(Refer to Engine Electrical System - "Battery") |
| 6. |
Remove the air cleaner assembly.
(Refer to Intake And Exhaust System - "Air Cleaner") |
| 7. |
Remove the surge tank.
(Refer to Intake And Exhaust System - "Surge Tank") |
| 8. |
Remove the low pressure fuel line.
(Refer to Engine Control / Fuel System - "Fuel Line") |
| 9. |
Remove the intake manifold (A).
|
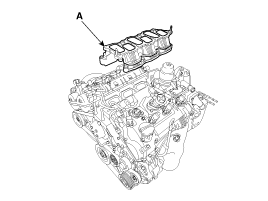

| 10. |
Install in the reverse order of removal.
|
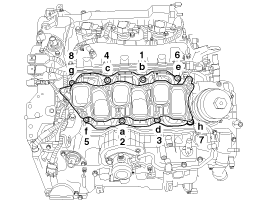
 Intake Manifold Components and Components Location
Components
1. Intake manifold
...
 Exhaust Manifold Components and Components Location
Components
1. LH Exhaust manifold gasket2. LH Exhaust manifold3. LH Heat protector4. LH Exhaust manifold stay5. RH Exhaust manifold gasket6. RH Exhaust manifold7. RH Heat protector8. RH Exhaust m ...
Other Information:
Rear parking assist system precautions
The rear parking assist system may not sound consistently depending on the
speed and shapes of the objects detected.
The rear parking assist system may malfunction if the vehicle bumper height ...
Schematic Diagrams
Circuit Diagram
...
Categories
- Home
- First Generation
- Second Generation
- Third generation
- Kia Sedona YP 2014-2026 Owners Manual
- Kia Sedona YP 2014-2026 Service Manual

Copyright © www.kisedona.com 2016-2026