
 Kia Sedona: Heater & A/C Control Unit (DATC) Repair procedures
Third generation YP (2014-2026) / Kia Sedona YP Service Manual / Heating,Ventilation And Air Conditioning / Controller / Heater & A/C Control Unit (DATC) Repair procedures
| Self Diagnosis |
| 1. |
Self-diagnosis process
|
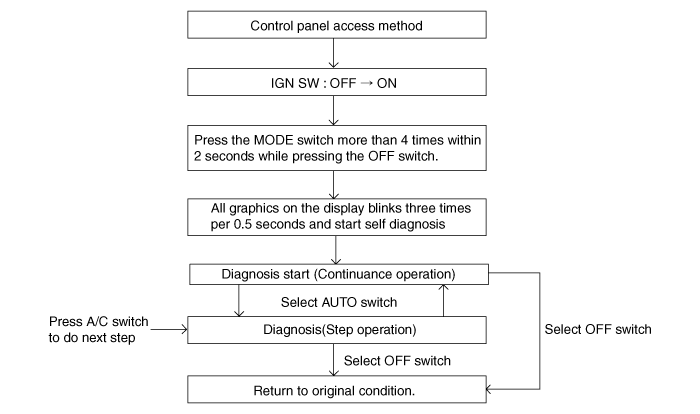
| 2. |
How to read self-diagnostic code
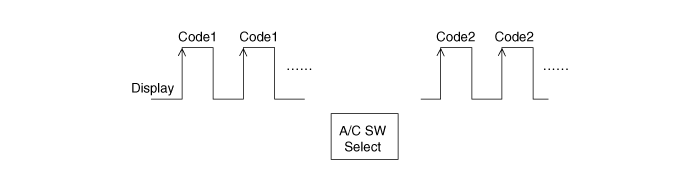
After the display panel flickers three times at 0.5 second
intervals, the corresponding fault code flickers on the setup
temperature display panel at 0.5 second intervals and two digit figure
will be displayed. Codes are indicated in numerical format. |
| 3. |
Fault code display
|


| 4. |
If fault codes are displayed during the check up, inspect possible causes of malfunction by referring to fault codes.
| ||||||||||||||||||||||||||||||||||||||||||||||||||||||||||||||||||||||||||||||||||||||||||||||||||||||||||||||||||||||||||||||||||||||||||||||||||||||||||||||||
| 5. |
Fail safe
|
| Replacement |
| 1. |
Disconnect the negative (-) battery terminal. |
| 2. |
Remove the crash pad lower panel.
(Refer to Body - "Crash Pad Lower Panel") |
| 3. |
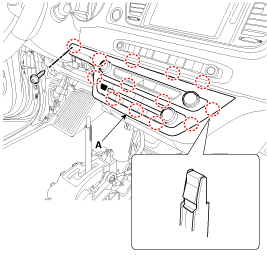
Remove the center fascia lower panel (A) after loosening the screw.
|
| 4. |
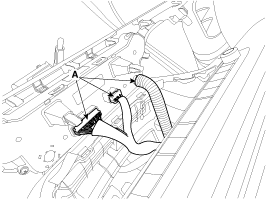
Disconnect the heater & A/C controller connectors (A).
|
| 5. |
Remove the heater & A/C controller (A) from center fascia lower panel (B) after loosening the screws.
|
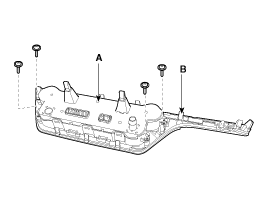
| 6. |
Install in the reverse order of removal.
|

 Heater & A/C Control Unit (DATC) Components and Components Location
Components (1)
Control Panel (AUDIO Type)
Connector Pin Function
Connector Pin NoFunctionConnector Pin NoFunctionA1ILL+ (TAIL)A29CLEAN CIGNAL2SENSOR REF (+5V)30-3-31-4-32-5MODE ACT' ...
 Heater & A/C Control Unit (Rear) Components and Components Location
Components (1)
[Standard]
Connector Pin Function
Connector Pin NoFunctionA1BATT2ILL+ (TAIL)3MODE ACT''R F/B - REAR4MODE ACT''R (VENT) - REAR5MODE ACT''R (FLOOR) - REAR6TEMP ACT''R F/B - ...
Other Information:
CVVT Oil Control Valve (OCV) Repair procedures
Inspection
1.
Turn the ignition switch OFF.
2.
Disconnect the OCV connector.
3.
Measure resistance between the OCV terminals 1 and 2.
4.
Check that the resistance is within the specifi ...
Washer Fluid Warning Light
This warning light illuminates :
...
Categories
- Home
- First Generation
- Second Generation
- Third generation
- Kia Sedona YP 2014-2026 Owners Manual
- Kia Sedona YP 2014-2026 Service Manual

Copyright © www.kisedona.com 2016-2026