 Kia Sedona: Engine Mounting Repair procedures
Third generation YP (2014-2026) / Kia Sedona YP Service Manual / Engine Mechanical System / Engine And Transaxle Assembly / Engine Mounting Repair procedures
| Removal and Installation |
Engine Mounting Bracket
| 1. |
Disconnect the battery negative terminal. |
| 2. |
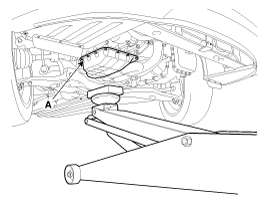
Install the jack to the edge of the lower oil pan (A) to support the engine.
|
| 3. |
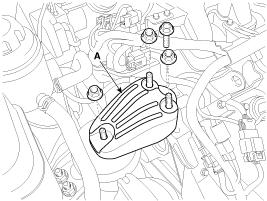
Remove the engine mounting support bracket (A).
|
| 4. |
Separate the reservoir tank to obtain space for removing the engine mounting bracket.
(Refer to Cooling System - "Reservoir Tank") |
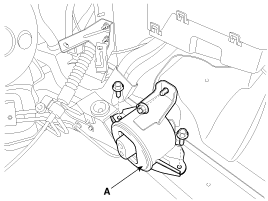
| 5. |
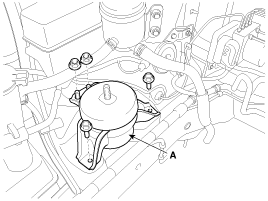
Remove the engine mounting bracket (A).
|
| 6. |
Install in the reverse order of removal. |
Roll rod Bracket
| 1. |
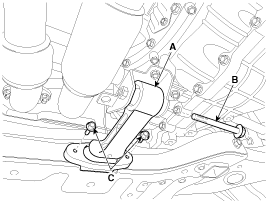
Remove the roll rod bracket (A).
|
| 2. |
Remove the roll rod mounting support bracket (A).
|
| 3. |
Install in the reverse order of removal. |
Transaxle Mounting Bracket
| 1. |
Remove the air duct.
(Refer to Intake And Exhaust System - "Air Cleaner") |
| 2. |
Remove the battery and battery tray.
(Refer to Engine Electrical System - "Battery") |
| 3. |
Remove the air cleaner assembly.
(Refer to Intake And Exhaust System - "Air Cleaner") |
| 4. |
Remove the engine control module (ECM).
(Refer to Engine Control/Fuel System - “Engine Control Module (ECM)”) |
| 5. |
Install jack under the transaxle to support it.
|
| 6. |
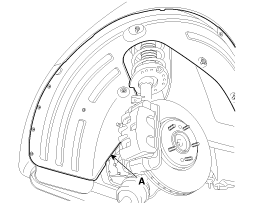
Remove the LH front wheel guard (A).
|
| 7. |
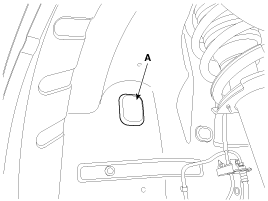
Remove the service cover (A).
|
| 8. |
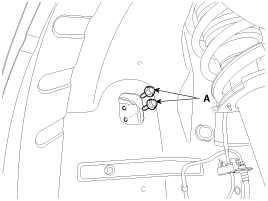
Remove the transaxle support bracket mounting bolt (A).
|
| 9. |
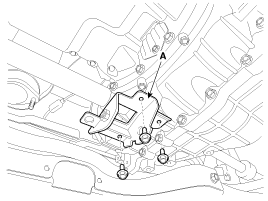
Remove the transaxle mounting bracket (A).
|
| 10. |
Install in the reverse order of removal. |
 Engine Mounting Components and Components Location
Components
1.Engine mounting support bracket2.Engine mounting bracket3.Transaxle mounting bracket4.Roll rod bracket
...
 Engine And Transaxle Assembly Repair procedures
Removal
•
Use fender covers to avoid damaging painted surfaces.
•
To avoid damage, unplug the wiring connectors carefully while holding the connec ...
Other Information:
Electronic Power Steering (EPS) Warning Light
This warning light illuminates :
Once you set the ignition switch or Engine Start/Stop Button to the ON position.
- It remains on until the engine is started.
When there is a malfunction wit ...
Seat Belt Buckle Switch (BS) Components and Components Location
Components
...
Categories
- Home
- First Generation
- Second Generation
- Third generation
- Kia Sedona YP 2014-2026 Owners Manual
- Kia Sedona YP 2014-2026 Service Manual
Copyright © www.kisedona.com 2016-2026

