 Kia Sedona: AUX jack Repair procedures
Third generation YP (2014-2025) / Kia Sedona YP Service Manual / Body Electrical System / AVN System / AUX jack Repair procedures
| Removal |
Multimedia Jack
| 1. |
Disconnect the negative (-) battery terminal. |
| 2. |
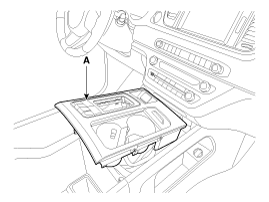
Remove the console upper cover (A).
(Refer to Body - "Floor Console Assembly")
|
| 3. |
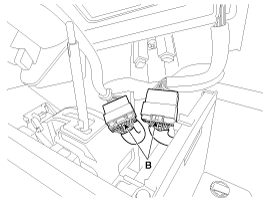
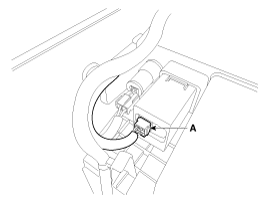
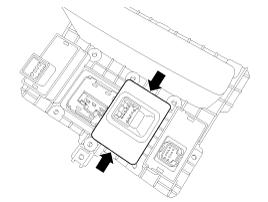
Disconnect the multimedia jack connector (A) and multi switch connector (B).
|
| 4. |
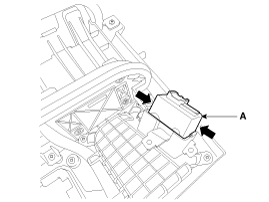
Remove the multimedia jack (A) after releasing the fixed hooks.
|
USB Charger (Front Seat)
| 1. |
Disconnect the negative (-) battery terminal. |
| 2. |
Remove the rear console assembly.
(Refer to Body - "Floor Console Assembly") |
| 3. |
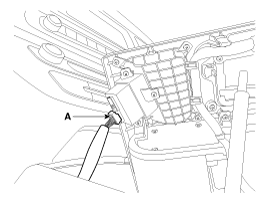
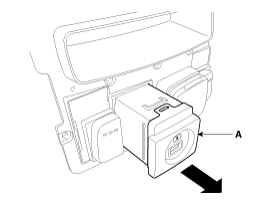
Disconnect the USB charger connector (A).
|
| 4. |
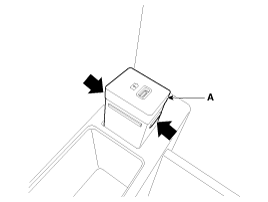
Remove the USB charger (A) after releasing the fixed hooks.
|
USB Charger (Rear Seat)
| 1. |
Disconnect the negative (-) battery terminal. |
| 2. |
Remove the rear console cover.
(Refer to Body - "Rear Console Cover") |
| 3. |
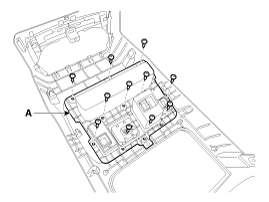
Remove the floor console tray (A) after loosening the screws.
|
| 4. |
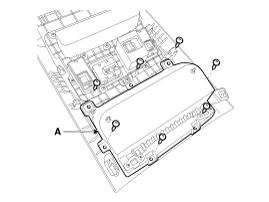
Remove the rear console switch panel (A) after loosening the screws.
|
| 5. |
Remove the usb charger (A) after releasing the fixed hooks.
|
| Installation |
Multimedia Jack
| 1. |
Install the multimedia jcak. |
| 2. |
Connect the console upper cover connector. |
| 3. |
Install the console upper cover. |
| 4. |
Connect the negative (-) battery terminal. |
USB Charger (Front Seat)
| 1. |
Install the USB charger. |
| 2. |
Connect the USB charger connector. |
| 3. |
Install the rear console assembly. |
| 4. |
Connect the negative (-) battery terminal. |
USB Charger (Rear Seat)
| 1. |
Install the USB charger. |
| 2. |
Install the rear console switch panel. |
| 3. |
Install the floor console tray. |
| 4. |
Connect the USB charger connector. |
| 5. |
Install the rear console cover. |
| 6. |
Connect the negative (-) battery terminal. |
 AUX jack Description and Operation
Description
Using the added option of multimedia jack on the console
upper cover, users can link their external portable music players such
as MP3 and iPod to the vehicle''s sound system via th ...
Other Information:
Tilting the sunroof (for front sunroof)
To open the sunroof, push the sunroof control lever upward until the sunroof
moves to the desired position.
To close the sunroof, push the sunroof lever forward or pull downward until the
sunro ...
Accelerator Position Sensor (APS) Description and Operation
Description
Accelerator Position Sensor (APS), installed on the
accelerator pedal module, detects the rotation angle of the accelerator
pedal. The APS, one of the most important sensors in engi ...
Categories
- Home
- First Generation
- Second Generation
- Third generation
- Kia Sedona YP 2014-2025 Owners Manual
- Kia Sedona YP 2014-2025 Service Manual
Copyright © www.kisedona.com 2016-2025

