 Kia Sedona: Condenser Repair procedures
Third generation YP (2014-2026) / Kia Sedona YP Service Manual / Heating,Ventilation And Air Conditioning / Air conditioning System / Condenser Repair procedures
| Inspection |
| 1. |
Check the condenser fins for clogging and damage. If clogged,
clean them with water, and blow them with compressed air. If bent,
gently bend them using a screwdriver or pliers. |
| 2. |
Check the condenser connections for leakage, and repair or replace it, if required.
|
| Replacement |
| 1. |
Recover the refrigerant with a recovery/recycling/charging station. |
| 2. |
Disconnect the negative (-) battery terminal. |
| 3. |
Remove the front bumper.
(Refer to Body - "Front Bumper Cover") |
| 4. |
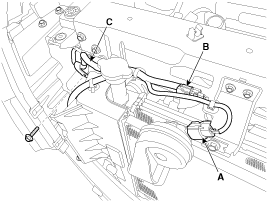
Disconnect the horn connector (A). |
| 5. |
Disconnect the hood latch connector (B). |
| 6. |
Disconnect the over flow hose (C).
|
| 7. |
Remove the cooling fan assembly.
(Refer to Cooling System - "Cooling Fan") |
| 8. |
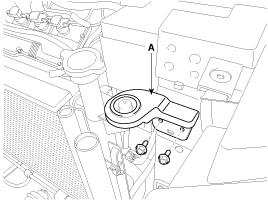
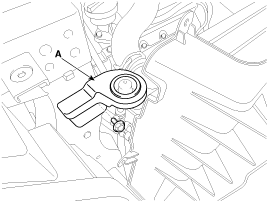
Remove the radiator upper bracket (A).
[LH]
[RH]
|
| 9. |
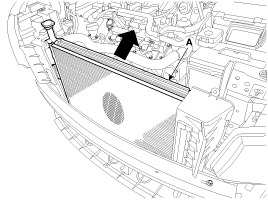
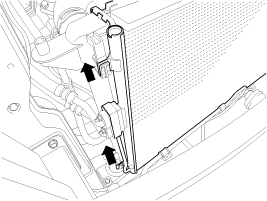
Separate the radiator assembly (A) to obtain space for remove the air guard.
|
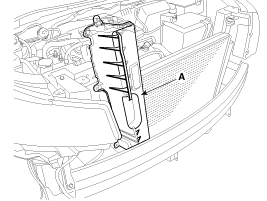
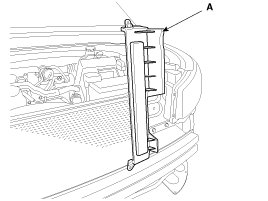
| 10. |
Remove the air guard (A).
[LH]
[RH]
|
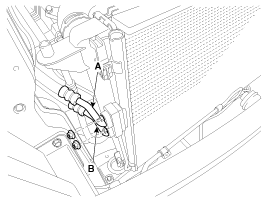
| 11. |
Remove the 2 nuts, and then disconnect the discharge line (A) and liquid line (B) from the condenser.
|
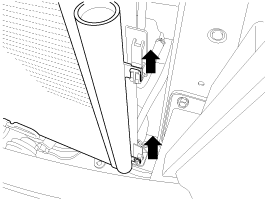
| 12. |
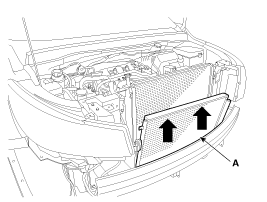
Remove the condenser (A) from the radiator.
[LH]
[RH]
|
| 13. |
Install in the reverse order of removal.
|
 Condenser Components and Components Location
Components
1. Condenser
...
 Receiver-Drier Repair procedures
Replacement
1.
Remove the condenser.
2.
Remove the cap (B) on the bottom of the condenser with an L wrench (A).
Tightening torque :
9.8 ~ 14.7 N.m (1.0 ~ 1.5 kgf.m, 7.2 ~ 10.8 lb-ft)
...
Other Information:
35R Clutch Control Solenoid Valve(35R/C_VFS) Description and Operation
Description
•
35R clutch control solenoid valve is a Variable Force Solenoid (VFS) type.
•
When TCM supplies variable current to solenoid valve, hydraulic pressure of 35R clutc ...
Snowy or icy conditions
To drive your vehicle in deep snow, it may be necessary to use snow tires on
your tires. If snow tires are needed, it is necessary to select tires equivalent
in size and type of the original equip ...
Categories
- Home
- First Generation
- Second Generation
- Third generation
- Kia Sedona YP 2014-2026 Owners Manual
- Kia Sedona YP 2014-2026 Service Manual
Copyright © www.kisedona.com 2016-2026

