
 Kia Sedona: Rear Door Latch Repair procedures
Third generation YP (2014-2026) / Kia Sedona YP Service Manual / Body (Interior and Exterior) / Rear Door / Rear Door Latch Repair procedures
| Replacement |
| [Front] |
| 1. |
Remove the rear door trim.
(Refer to Rear Door - "Rear Door Trim") |
| 2. |
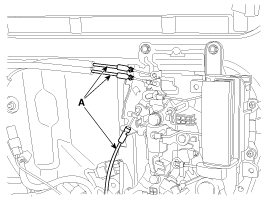
Disconnect the rear door cable (A).
|
| 3. |
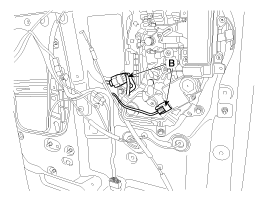
Disconnect the rear door remote controller connector (B).
|
| 4. |
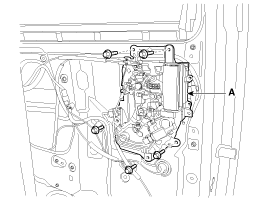
Loosen the bolts and remove the rear door remote controller (A).
|
| 5. |
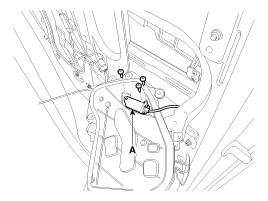
Loosen the screw and disconnect the rear door outside handle cable (A).
|
| 6. |
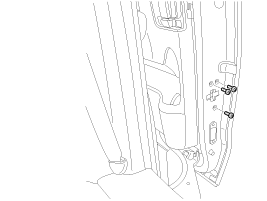
Loosen the rear door front latch mounting screws.
|
| 7. |
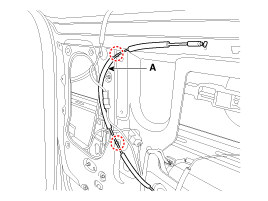
Remove the clip and then disconnect the rear door front latch cable (A).
|
| 8. |
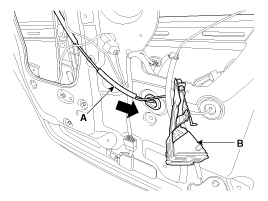
Put a cable (A) into the hole and then remove the rear door front latch (B).
|
| 9. |
Install in the reverse order of removal.
|

| [Rear] |
| 1. |
Remove the rear door trim.
(Refer to Rear Door - "Rear Door Trim") |
| 2. |
Remove the rear door trim seal. |
| 3. |
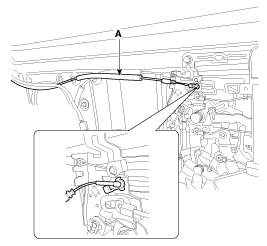
Disconnect the rear door latch cable (A).
|
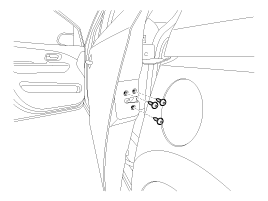
| 4. |
Loosen the rear door rear latch mounting screw.
|
| 5. |
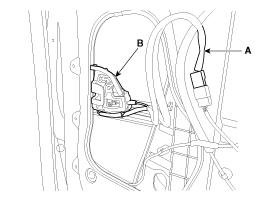
Disconnect the rear door latch connector (A) and then remove the rear door rear latch (B).
|
| 6. |
Install in the reverse order of removal.
|
 Rear Door Latch Components and Components Location
Component Location
1. Rear door front latch2. Rear door rear latch
...
 Rear Door Belt Outside Weatherstrip Repair procedures
Replacement
1.
Pull down rear door window glass by pressing the power window glass switch.
2.
After loosening the mounting screws, remove the rear door belt outside weatherstrip (A).
3.
In ...
Other Information:
Heater Core Repair procedures
Replacement
1.
Disconnect the negative (-) battery terminal.
2.
After loosening the nuts and bolts, remove the main crash pad and cowl cross bar assembly (A) altogether.
(Refer to Heater - "H ...
Clock
Hour (1)
Pressing the H button will advance the time displayed by one hour.
Minute (2)
Pressing the M button will advance the time displayed by one minute.
To change the 24 hour format to the 12 ...
Categories
- Home
- First Generation
- Second Generation
- Third generation
- Kia Sedona YP 2014-2026 Owners Manual
- Kia Sedona YP 2014-2026 Service Manual

Copyright © www.kisedona.com 2016-2026