 Kia Sedona: Front Strut Assembly Repair procedures
Third generation YP (2014-2026) / Kia Sedona YP Service Manual / Suspension System / Front Suspension System / Front Strut Assembly Repair procedures
| Removal |
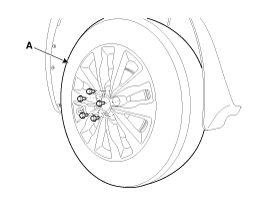
| 1. |
Remove the front wheel and tire (A) from front hub.
|

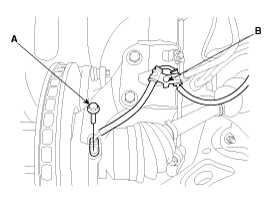
| 2. |
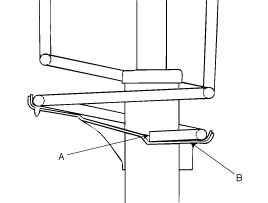
Disconnect the stabilizer link (B) with the front strut assembly (A) after loosening the nut.
|
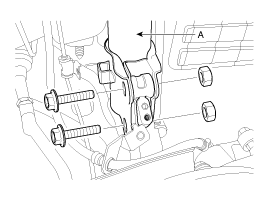
| 3. |
Disconnect the front strut assembly (A) from the knuckle by loosening the bolt and nut.
|

| 4. |
Disconnect the front strut assembly(A) with the knuckle by loosening the bolt & nut.
|
| 5. |
Remove the cowl top cover.
(Refer to Body (Interior and Exterior) - "Cowl Top Cover") |
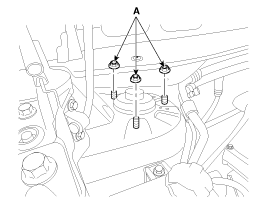
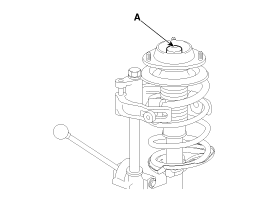
| 6. |
Loosening the nut (A) and then remove the strut assembly.
|
| Disassembly |
| 1. |
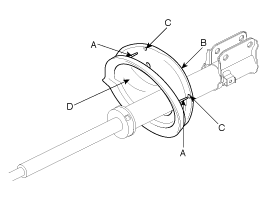
Remove the dust cover (A).
|
| 2. |
Using the special tool (09546-26000), compress the coil spring (A). |
| 3. |
Remove the self-locking nut (C) from the strut assembly(B).
|
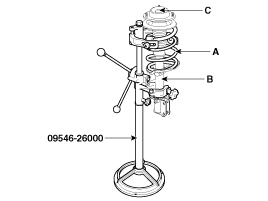
| 4. |
Remove the insulator, spring seat, coil spring and dust cover from the strut assembly. |
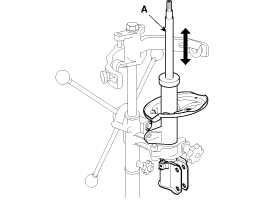
| Inspection |
| 1. |
Check the strut insulator for wear or damage. |
| 2. |
Check rubber parts for damage or deterioration. |
| 3. |
Compress and extend the piston rod (A) and check that there is no abnormal resistance or unusual sound during operation.
|
Disposal
| 1. |
Fully extend the piston rod. |
| 2. |
Drill a hole on the A section to remove gas from the cylinder.
|
| Reassembly |
| 1. |
Install the spring lower pad (D) so that the protrusions (A) fit in the holes (C) in the spring lower seat (B).
|
| 2. |
Compress coil spring using special tool (09546-26000). Install compressed coil spring into shock absorber.
|

| 3. |
After fully extending the piston rod, install the spring upper seat and insulator assembly. |
| 4. |
After seating the upper and lower ends of the coil spring (A)
in the upper and lower spring seat grooves (B) correctly, tighten new
self-locking nut temporarily.
|
| 5. |
Remove the special tool (09546-26000). |
| 6. |
Tighten the self-locking nut to the specified torque.
|
 Front Strut Assembly Components and Components Location
Components
1. Strut assembly2. Insulator3. Bearing4. Spring upper pad5. Spring6. Dust cover7. Spring lower pad
...
 Front Lower Arm Repair procedures
Removal
1.
Remove the front wheel and tire (A) from the front hub.
Tightening torque:
88.2 ~ 107.8 N.m (9.0 ~ 11.0 kgf.m, 65.0 ~ 79.5 lb-ft)
Be careful not to d ...
Other Information:
Changing the coolant
Have the coolant changed by an authorized Kia dealer according to the Maintenance
Schedule at the beginning of this chapter.
Put a thick cloth around the radiator cap before refilling the coolant i ...
Repair procedures
Replacement
[Front]
Put on gloves to protect your hands.
•
When prying with a flat-tip screwdriver, wrap it with
protective ...
Categories
- Home
- First Generation
- Second Generation
- Third generation
- Kia Sedona YP 2014-2026 Owners Manual
- Kia Sedona YP 2014-2026 Service Manual

Copyright © www.kisedona.com 2016-2026