 Kia Sedona: Condenser Repair procedures
Third generation YP (2014-2026) / Kia Sedona YP Service Manual / Heating,Ventilation And Air Conditioning / Air conditioning System / Condenser Repair procedures
| Inspection |
| 1. |
Check the condenser fins for clogging and damage. If clogged,
clean them with water, and blow them with compressed air. If bent,
gently bend them using a screwdriver or pliers. |
| 2. |
Check the condenser connections for leakage, and repair or replace it, if required.
|
| Replacement |
| 1. |
Recover the refrigerant with a recovery/recycling/charging station. |
| 2. |
Disconnect the negative (-) battery terminal. |
| 3. |
Remove the front bumper.
(Refer to Body - "Front Bumper Cover") |
| 4. |
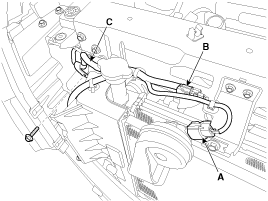
Disconnect the horn connector (A). |
| 5. |
Disconnect the hood latch connector (B). |
| 6. |
Disconnect the over flow hose (C).
|
| 7. |
Remove the cooling fan assembly.
(Refer to Cooling System - "Cooling Fan") |
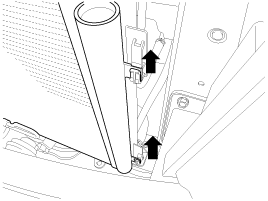
| 8. |
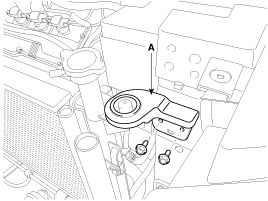
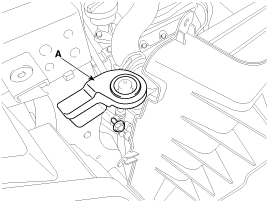
Remove the radiator upper bracket (A).
[LH]
[RH]
|
| 9. |
Separate the radiator assembly (A) to obtain space for remove the air guard.
|

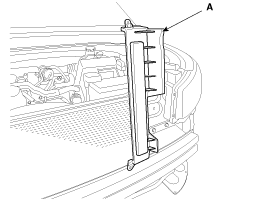
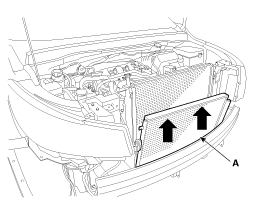
| 10. |
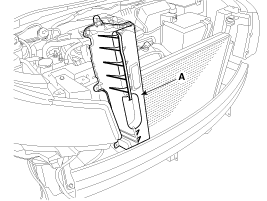
Remove the air guard (A).
[LH]
[RH]
|
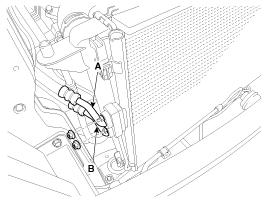
| 11. |
Remove the 2 nuts, and then disconnect the discharge line (A) and liquid line (B) from the condenser.
|
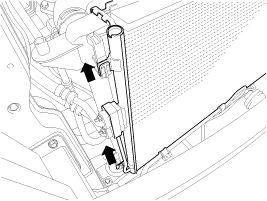
| 12. |
Remove the condenser (A) from the radiator.
[LH]
[RH]
|
| 13. |
Install in the reverse order of removal.
|

 Condenser Components and Components Location
Components
1. Condenser
...
 Receiver-Drier Repair procedures
Replacement
1.
Remove the condenser.
2.
Remove the cap (B) on the bottom of the condenser with an L wrench (A).
Tightening torque :
9.8 ~ 14.7 N.m (1.0 ~ 1.5 kgf.m, 7.2 ~ 10.8 lb-ft)
...
Other Information:
Antenna Repair procedures
Removal
1.
Remove the roof trim assembly.
(Refer to Body - "Roof Trim Assembly")
2.
Disconnect the roof antenna connectors (A).
3.
Remove the roof antenna (A) after loosening a nut (B).
...
Torque Converter Control Solenoid Valve (T/CON_VFS) Schematic Diagrams
Circuit Diagram
...
Categories
- Home
- First Generation
- Second Generation
- Third generation
- Kia Sedona YP 2014-2026 Owners Manual
- Kia Sedona YP 2014-2026 Service Manual

Copyright © www.kisedona.com 2016-2026