
 Kia Sedona: Photo Sensor Repair procedures
Third generation YP (2014-2026) / Kia Sedona YP Service Manual / Heating,Ventilation And Air Conditioning / Air conditioning System / Photo Sensor Repair procedures
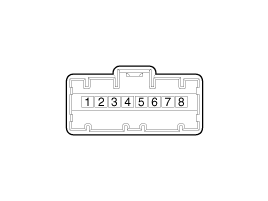
| Inspection |
| 1. |
Turn the ignition switch ON. |
| 2. |
Connect the GDS. |
| 3. |
Emit intensive light toward the photo sensor using a lamp, and check the output voltage change. |
| 4. |
The voltage will increase with higher light intensity and decrease with lower light intensity.
|
| Replacement |
| 1. |
Disconnect the negative (-) battery terminal. |
| 2. |
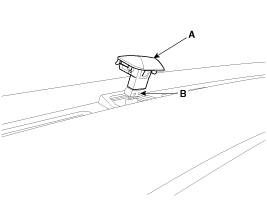
With a flat-head screwdriver, remove the photo sensor (A)
from the center of the defrost nozzle after disconnecting the connector
(B).
|
| 3. |
Install in the reverse order of removal. |
 Photo Sensor Description and Operation
Description
The photo sensor is located at the center of the defrost nozzles.
The photo sensor contains a photovoltaic (sensitive to
sunlight) diode. The solar radiation received by its light r ...
 Ambient Temperature Sensor Description and Operation
Description
The ambient temperature sensor is located at the front of the
condenser and detects ambient air temperature. It is a negative type
thermistor; resistance will increase with lower te ...
Other Information:
Power sliding door non-opening conditions
The power sliding door is not automatically opened, but closed under the following
conditions. If the main or sub control button is pushed for power opening operation,
the chime sounds once.
When ...
Specifications
Specification
ItemsBulb TypeBulb Wattage (W)FrontHead lamp (STD)LowH7SLL55HighH7LL55Head lamp (HID)LowD3S35HighH7LL55Turn signal lampPY28/8W28Position lampPY28/8W8Fog lampH8 or HB435 or 55Side re ...
Categories
- Home
- First Generation
- Second Generation
- Third generation
- Kia Sedona YP 2014-2026 Owners Manual
- Kia Sedona YP 2014-2026 Service Manual

Copyright © www.kisedona.com 2016-2026