
 Kia Sedona: Rear Door Trim Repair procedures
Third generation YP (2014-2026) / Kia Sedona YP Service Manual / Body (Interior and Exterior) / Rear Door / Rear Door Trim Repair procedures
| Replacement |
Put on gloves to protect your hands. |

|

| 1. |
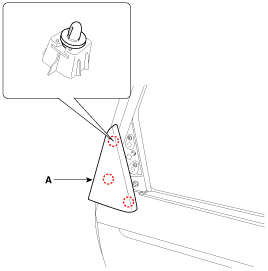
Using a screwdriver or remover, remove the rear door delta inner cover (A).
|
| 2. |
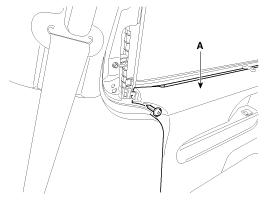
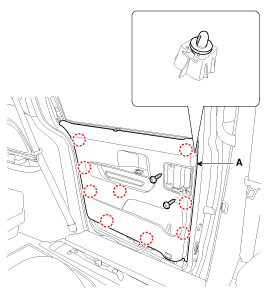
After loosening the mounting screw, remove the rear door trim (A).
|
| 3. |
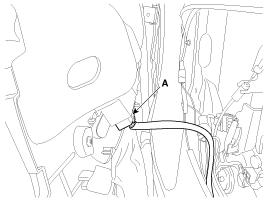
Disconnect the power window switch connector (A).
|
| 4. |
Install in the reverse order of removal.
|

 Rear Door Trim Components and Components Location
Component Location
1. Rear door trim
...
 Rear Door Curtain Assembly Repair procedures
Replacement
Put on gloves to protect your hands.
•
When prying with a flat-tip screwdriver, wrap it with
protective tape, and ...
Other Information:
Special Service Tools
Special Service Tools
Tool (Number and name)IllustrationUse09880-4F000Hog ring clip installerHog ring clip installation
...
Warning type
If the vehicle detected by sensors approaches your vehicle, the warning
chime will sound and the warning light will blink on the outside rearview mirror.
If the detected vehicle is out of th ...
Categories
- Home
- First Generation
- Second Generation
- Third generation
- Kia Sedona YP 2014-2026 Owners Manual
- Kia Sedona YP 2014-2026 Service Manual

Copyright © www.kisedona.com 2016-2026