 Kia Sedona: Rear Seat Assembly Repair procedures
Third generation YP (2014-2026) / Kia Sedona YP Service Manual / Body (Interior and Exterior) / Rear Seat / Rear Seat Assembly Repair procedures
| Replacement |
[Second row seat assembly]
| [7Seat/8Seat] |
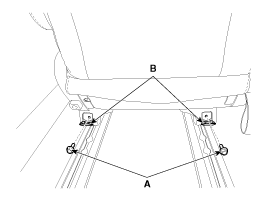
| 1. |
Loosen the second row seat front mounting bolts (A) after opening the cap (B).
|
| 2. |
Pull up the seat by pulling the stand-up lever. |
| 3. |
Loosen the second row seat rear mounting bolts (A) after opening the cap (B).
|
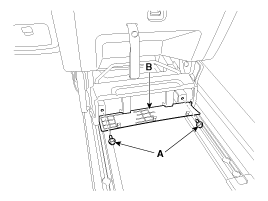
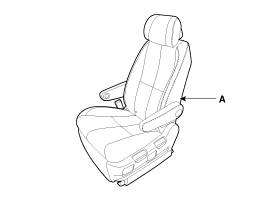
| 4. |
Remove the second row seat assembly (A).
|
| 5. |
Install in the reverse order of removal. |
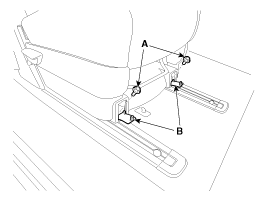
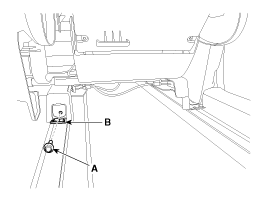
| [Leg support type] |
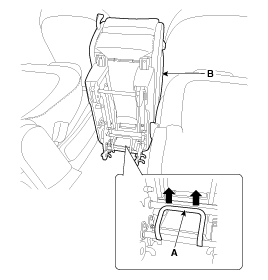
| 1. |
Loosen the seat front mounting bolts (A) after opening the cap (B).
[LH]
|
| 2. |
Pull up the seat by pulling the stand-up lever. |
| 3. |
Loosen the seat rear mounting bolts (A) after opening the cap (B).
|
| 4. |
Remove the second row seat assembly (A).
|
| 5. |
Install in the reverse order of removal. |
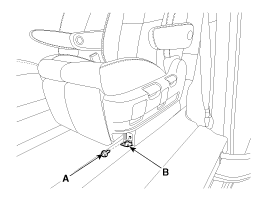
[Second row center seat assembly]
| 1. |
Tumble the second row center seat assembly (B) after pulling the lever (A).
|
| 2. |
Remove the second row center seat assembly (B) after pulling the lever (A) in the direction of arrow.
|
| 3. |
Install in the reverse order of removal. |
[Third row seat assembly]
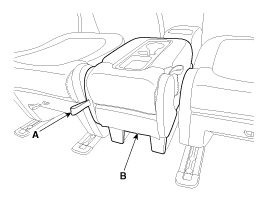
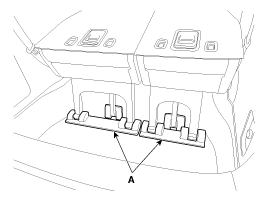
| 1. |
Using a screwdriver or remover, remove the third row seat leg cover (A).
|
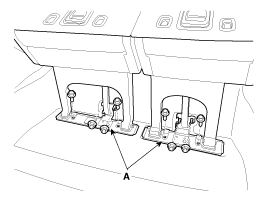
| 2. |
Remove the third row seat assembly (A) after loosening the bolts and nuts.
|
| 3. |
Install in the reverse order of removal. |
 Rear Seat Assembly Components and Components Location
Component Location
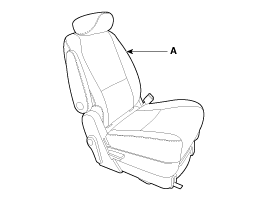
[Second Row Seat Assembly]
1. Second Row Seat Assembly [RH]2. Second Row Center Seat Assembly3. Second Row Seat Assembly [LH]
1. Second Row Seat Assembly
[Third ...
 Rear Seat Back Cover Components and Components Location
Component Location
[Second Row Seat Assembly]
1. Second Row Seat Back Cover [RH]2. Second Row Center Seat Back Cover3. Second Row Seat Back Cover [LH]
1. Second Row Seat Back Cover
...
Other Information:
Compressor oil Repair procedures
Oil Specification
1.
The HFC-134a system requires synthetic (PAG) compressor oil
whereas the R-12 system requires mineral compressor oil. The two oils
must never be mixed.
2.
Compressor (P ...
Water pump Troubleshooting
Troubleshooting
Trouble SymptomProbable CauseRemedyCoolant leakage
•
From the bleed hole of the water pump
Visually check
•
Check leaks after about 10 minutes of warming up.
...
Categories
- Home
- First Generation
- Second Generation
- Third generation
- Kia Sedona YP 2014-2026 Owners Manual
- Kia Sedona YP 2014-2026 Service Manual

Copyright © www.kisedona.com 2016-2026