 Kia Sedona: Rear Door Window Glass Repair procedures
Third generation YP (2014-2026) / Kia Sedona YP Service Manual / Body (Interior and Exterior) / Rear Door / Rear Door Window Glass Repair procedures
| Replacement |
| 1. |
Remove the rear door trim.
(Refer to Rear Door - "Rear Door Trim") |
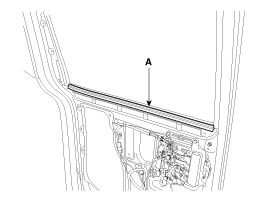
| 2. |
Remove the rear door belt inside weatherstrip (A).
|
| 3. |
Pull down rear door window glass by pressing the power window glass switch. |
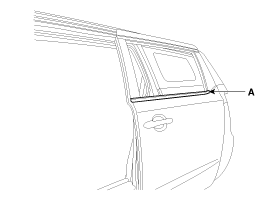
| 4. |
After loosening the mounting screws, remove the rear door belt outside weatherstrip (A).
|
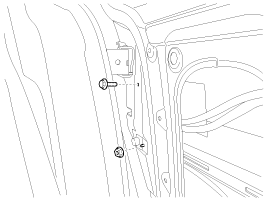
| 5. |
Completely loosen the rear door channel mounting bolt and
loosen the nuts as much as possible until they are just enough to hold
the rear door panel. |
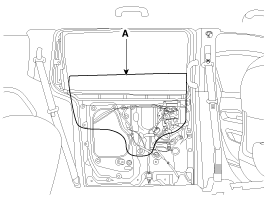
| 6. |
Slightly push the rear door channel in the direction of the arrow in the illustration below.
|
| 7. |
Remove the rear door window glass mounting hole plug (A).
|
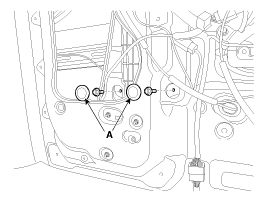


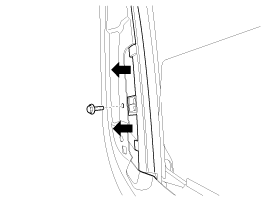
| 8. |
Carefully adjust the rear door window glass (A) until you can
see the bolt, then loosen them. Separate the glass from the glass run
and carefully pull the glass out through the window slot.
|
| 9. |
Install in the reverse order of removal.
|
 Rear Door Window Glass Components and Components Location
Component Location
1. Rear door window glass
...
 Rear Door Power Window Regulator Components and Components Location
Component Location
1. Rear door module
...
Other Information:
Hood Assembly Repair procedures
Replacement
•
Be careful not to damage the hood and body.
•
When removing and installing the hood, work in a group o ...
Relay Box (Passenger Compartment) Description and Operation
Description
Auto Cut System Of Dark Current
AbbreviationExplanationACUAirbag Control UnitADMAssist Door ModuleB_CANBody Controller Area NetworkBCMBody Control ModuleBSDBlind Spot DetectionC_CANC ...
Categories
- Home
- First Generation
- Second Generation
- Third generation
- Kia Sedona YP 2014-2026 Owners Manual
- Kia Sedona YP 2014-2026 Service Manual

Copyright © www.kisedona.com 2016-2026