 Kia Sedona: Front Seat Cushion Cover Repair procedures
Third generation YP (2014-2026) / Kia Sedona YP Service Manual / Body (Interior and Exterior) / Front Seat / Front Seat Cushion Cover Repair procedures
| Replacement |
|

| 1. |
Remove the front seat assembly.
(Refer to Front Seat - "Front Seat Assembly") |
| 2. |
Remove the front seat shield outer cover.
(Refer to Front Seat - "Front Seat Shield Outer Cover") |
| 3. |
Remove the front seat shield inner cover.
(Refer to Front Seat - "Front Seat Shield Inner Cover") |
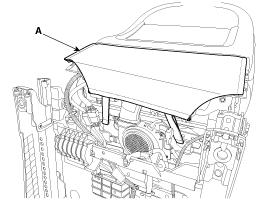
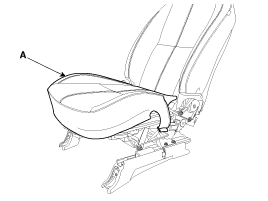
| 4. |
Remove the front seat lower protector (A).
|
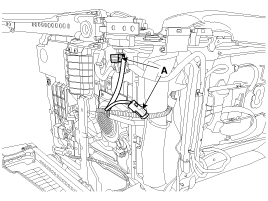
| 5. |
Disconnect the front seat connectors (A).
|
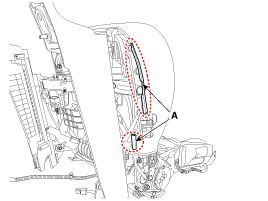
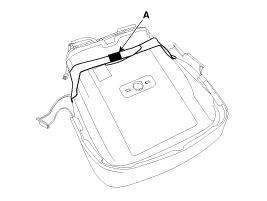
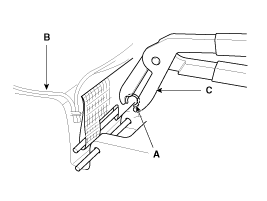
| 6. |
Disconnect the front seat cushion fixing hook (A) from front seat cushion frame.
[LH]
[RH]
[FRONT]
[REAR]
|
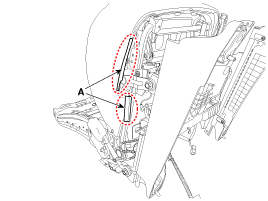
| 7. |
Remove the front seat cushion cover (A) from the front seat cushion frame.
|
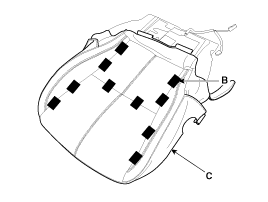
| 8. |
After removing the velcro tape (A) and hog-ring clips (B)
from inside the front seat cushion cover, separate the front seat
cushion cover (C).
|
| 9. |
Install in the reverse order of removal.
|

 Front Seat Cushion Cover Components and Components Location
Component Location
1. Front seat cushion cover
...
 Front Seat Frame Assembly Components and Components Location
Component Location
1. Front seat back frame assembly2. Front seat cushion frame assembly
...
Other Information:
Rear Bumper Cover Repair procedures
Replacement
•
When prying with a flat-tip screwdriver, wrap it with
protective tape, and apply protective tape around the related parts, to
prevent damage. ...
Climate Seat Unit Components and Components Location
Components
...
Categories
- Home
- First Generation
- Second Generation
- Third generation
- Kia Sedona YP 2014-2026 Owners Manual
- Kia Sedona YP 2014-2026 Service Manual

Copyright © www.kisedona.com 2016-2026