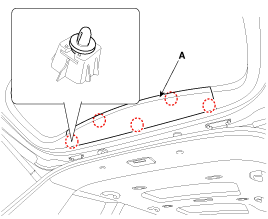
[Tail gate upper trim]
Put on gloves to protect your hands.
•
When prying with a flat-tip screwdriver, wrap it with
protective tape, and apply protective tape around the related parts, to
prevent damage.
•
Take care not to scratch the body surface.
1.
Using a screwdriver or remover, remove the tail gate upper trim (A).
2.
Install in the reverse order of removal.
•
Replace any damaged clips.
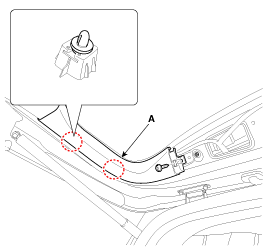
[Tail gate side trim]
Put on gloves to protect your hands.
•
When prying with a flat-tip screwdriver, wrap it with
protective tape, and apply protective tape around the related parts, to
prevent damage.
•
Take care not to scratch the body surface.
1.
Remove the tail gate upper trim.
2.
After loosening the mounting screw, remove the tail gate side trim (A).
3.
Install in the reverse order of removal.
•
Replace any damaged clips.
[Tail gate trim]
Put on gloves to protect your hands.
•
When prying with a flat-tip screwdriver, wrap it with
protective tape, and apply protective tape around the related parts, to
prevent damage.
•
Take care not to scratch the body surface.
1.
Remove the tail gate upper trim.
2.
Remove the tail gate side trim.
3.
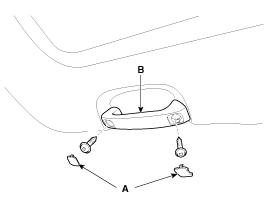
Remove the inside handle cap (A).
4.
Loosen the screw and remove the inside handle (B).
5.
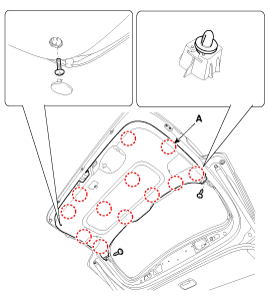
After loosening the mounting slips and screws, remove the tail gate trim (A).
6.
Install in the reverse order of removal.
Replace any damaged clips.
Component Location
1. Tail gate trim
...
Component Location
1. Tail gate latch assembly
...
 Kia Sedona: Tail Gate Trim Repair procedures
 Tail Gate Trim Components and Components Location
 Tail Gate Latch Components and Components Location


