 Kia Sedona: Smart Tailgate Latch Repair procedures
Third generation YP (2014-2025) / Kia Sedona YP Service Manual / Body Electrical System / Smart Tailgate System / Smart Tailgate Latch Repair procedures
| Removal |
| 1. |
Disconnect the negative (-) battery terminal. |
| 2. |
Remove the tail gate trim.
(Refer to Body - "Tail Gate Trim") |
| 3. |
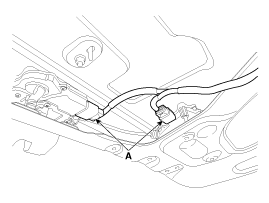
Disconnect the smart tailgate latch and PCU assembly connector (A).
|
| 4. |
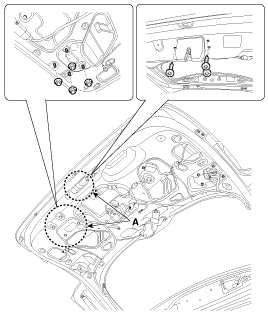
Loosen the smart tailgate latch mounting bolts. |
| 5. |
Remove the smart tailgate latch and PCU assembly (A) after loosening the nuts.
|
| Installation |
| 1. |
Install the smart tailgate latch and PCU assembly. |
| 2. |
Connect the smart tailgate latch and PCU assembly connector. |
| 3. |
Install the tail gate trim. |
| 4. |
Connect the negative (-) battery terminal. |
| Inspection |
| Inspection of the Smart Tailgate using GDS |
| 1. |
Check up through GDS analyzing device, the failure code,
monitoring on entered value, and by forcefully operating actuator and
self diagnosis, failed area can be detected promptly. |
| 2. |
Select the vehicle and menu to analyze the Smart Tailgate module. |
| 3. |
Select the "STM" to check the DTC of the power trunk module. |
| 4. |
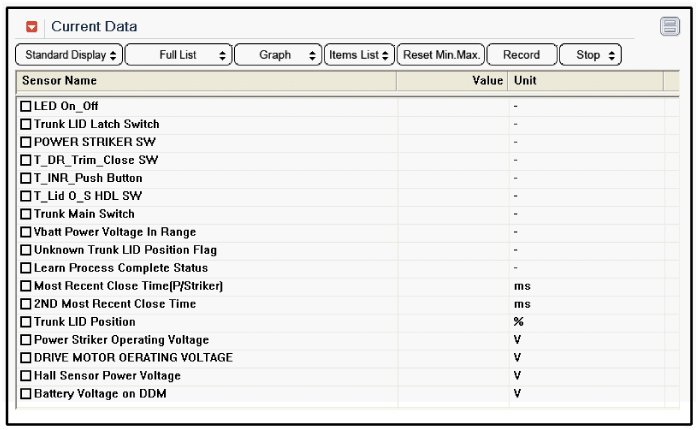
Select the "Service Data" to see the current status in
accordance with the input/output value. Offer status of the each switch
and sensor.
|
 Smart Tailgate Unit Repair procedures
Removal
1.
Disconnect the negative (-) battery terminal.
2.
Remove the luggage side trim [RH].
(Refer to Body - "Luggage Side Trim")
3.
Disconnect the smart tailgate unit connector (A).
...
 Anti-Pinch Strip Repair procedures
Removal
1.
Disconnect the negative (-) battery terminal.
2.
Remove the tail gate trim.
(Refer to Body - "Tail Gate Trim")
3.
Disconnect the anti-pinch strip sensor connector (A).
4.
R ...
Other Information:
Engine Mounting Components and Components Location
Components
1.Engine mounting support bracket2.Engine mounting bracket3.Transaxle mounting bracket4.Roll rod bracket
...
Oil Filter Body Repair procedures
Removal and Installation
1.
Remove the engine cover.
(Refer to Engine And Transaxle Assembly - "Engine Cover")
2.
Remove the air duct.
(Refer to Intake And Exhaust System - "Air Cleaner")
...
Categories
- Home
- First Generation
- Second Generation
- Third generation
- Kia Sedona YP 2014-2025 Owners Manual
- Kia Sedona YP 2014-2025 Service Manual
Copyright © www.kisedona.com 2016-2025


