 Kia Sedona: Power Window Switch Repair procedures
Third generation YP (2014-2026) / Kia Sedona YP Service Manual / Body Electrical System / Power Windows / Power Window Switch Repair procedures
| Removal |
|

Driver / Passenger Power Window Switch
| 1. |
Disconnect the negative (-) battery terminal. |
| 2. |
Remove the front door trim.
(Refer to Body - "Front Door Trim") |
| 3. |
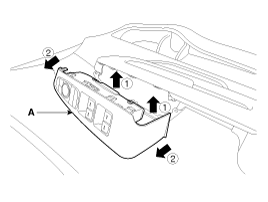
Loosen the front door armrest (A) mounting screws.
|
| 4. |
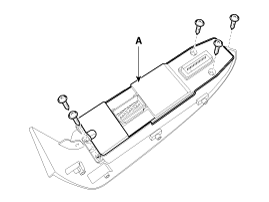
Using a screwdriver or remover, separate the mounting clips and then remove the driver door module panel (A).
|
| 5. |
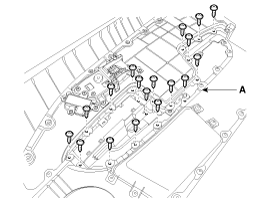
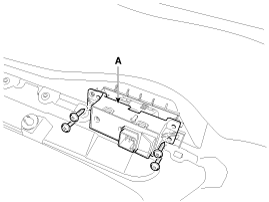
Loosen the mounting screws and then remove the driver door module(DDM) (A) after separating the mounting clips.
|
Rear Power Window Swtich
| 1. |
Disconnect the negative (-) battery terminal. |
| 2. |
Remove the rear door trim.
(Refer to Body - "Rear Door Trim") |
| 3. |
Remove the rear power window switch (A) after loosening the screws.
|
| Installation |
Driver / Passenger Power Window Switch
| 1. |
Install the driver door module (DDM). |
| 2. |
Install the driver door module panel. |
| 3. |
Install the front door armrest mounting screws. |
| 4. |
Install the front door trim. |
| 5. |
Connect the negative (-) battery terminal. |
Rear Power Window Swtich
| 1. |
Install the rear power window switch. |
| 2. |
Install the rear door trim. |
| 3. |
Connect the negative (-) battery terminal. |
| Inspection |
Diagnosis With GDS
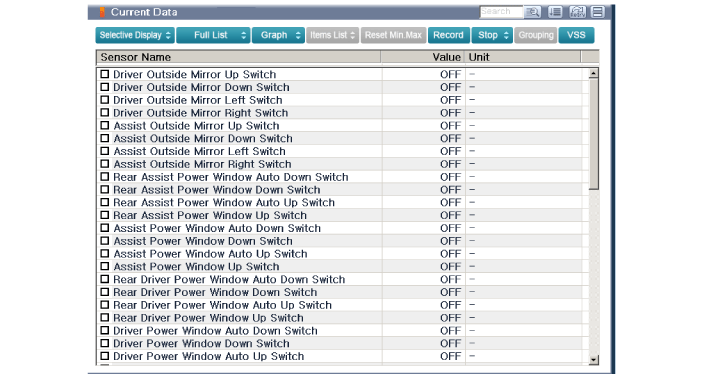
| 1. |
The body electrical system can be quickly diagnosed for faulty parts using vehicle diagnostic system (GDS).
The diagnostic system (GDS) provides the following information:
|
| 2. |
Select the ''Car model'' and the system to be checked in order to check the vehicle with the tester. |
| 3. |
Select the ''Body Control Module (BCM)'' to check the driver seat or assistant door module (DDM/ADM). |
| 4. |
Select the "Current Data" menu to search the current state of the input/output data.
The input/output data for the sensors corresponding to the driver seat or assistant door module (DDM/ADM) can be checked.
|
| 5. |
If you wish to check the power door lock operation by force, select "Actuation test". |
 Power Window Switch Schematic Diagrams
Circuit Diagram
Driver Power Window Switch
Assist Power Window Switch
[Assist Power Window Module (ADM, IMS)]
[Assist Power Window Switch (Non-IMS)]
Rear Power Window Switch
...
 Power Window Relay Repair procedures
Inspection
Diagnosis With GDS
1.
It can quickly diagnose defects of power window by
communicating with GDS. GDS can operate actuator forcefully, monitor
input/output values and self diagnose. ...
Other Information:
To decrease the crusie control set speed
Follow either of these procedures:
Move the lever down (to SET-), and hold it. Your vehicle set speed will
decrease by 10 km/h (5 mph). Release the lever at the speed you want.
Move the lev ...
Opening the hood
1. Pull the release lever to unlatch the hood. The hood should pop open slightly.
Open the hood after turning off the engine on a flat surface, shifting the shift
lever to the P (Park) position a ...
Categories
- Home
- First Generation
- Second Generation
- Third generation
- Kia Sedona YP 2014-2026 Owners Manual
- Kia Sedona YP 2014-2026 Service Manual

Copyright © www.kisedona.com 2016-2026