 Kia Sedona: Power Door Lock Actuators Repair procedures
Third generation YP (2014-2025) / Kia Sedona YP Service Manual / Body Electrical System / Power Door Locks / Power Door Lock Actuators Repair procedures
| Inspection |
Special care is needed for the following points in case of working with the non-gloss timber trimming.
|
Front Door Lock Actuator Inspection
| 1. |
Remove the front door trim.
(Refer to Body - "Front Door Trim") |
| 2. |
Remove the front door module.
(Refer to Body - "Front Door Module") |
| 3. |
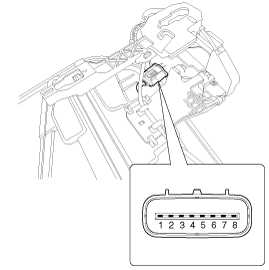
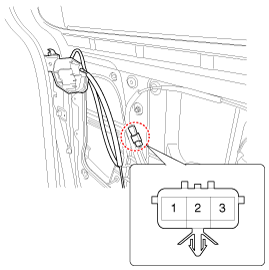
Disconnect the connector from the actuator.
| |||||||||||||||||||||||||||||
| 4. |
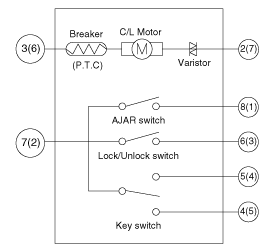
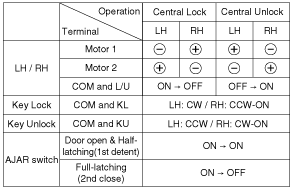
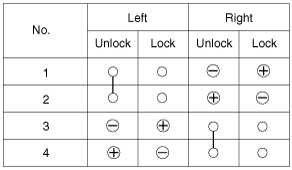
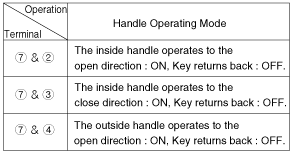
Check actuator operation by connecting power and ground
according to the table. To prevent damage to the actuator, apply battery
voltage only momentarily.
|
| 5. |
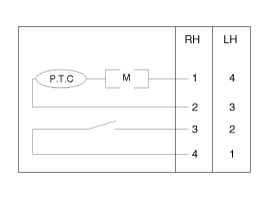
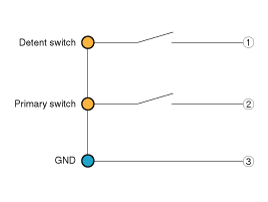
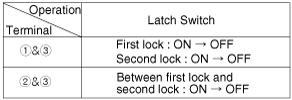
Check for continuity between terminals in half latching condition according to the table.
|
Rear Door Lock Actuator Inspection (Power Sliding Door Only)
| 1. |
Remove the rear door trim.
(Refer to Body - "Rear Door Trim") |
| 2. |
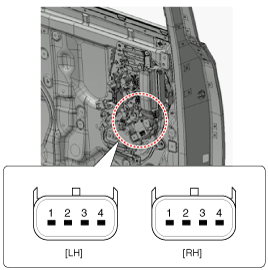
Disconnect the connector from the actuator.
|
| 3. |
Check actuator operation by connecting power and ground
according to the table. To prevent damage to the actuator, apply battery
voltage only momentarily.
|
| 4. |
Check for continuity between terminals in half latching condition according to the table.
|
Rear Door Unlock Latch Actuator Inspection
| 1. |
Remove the rear door trim.
(Refer to Body - "Rear Door Trim") |
| 2. |
Disconnect the connector from the actuator.
|
| 3. |
Check actuator operation by connecting power and ground
according to the table. To prevent damage to the actuator, apply battery
voltage only momentarily.
|
| 4. |
Check for continuity between terminals in half latching condition according to the table.
|
Rear Door Lock Latch Inspection
| 1. |
Remove the rear door trim.
(Refer to Body - "Rear Door Trim") |
| 2. |
Remove the rear door screen. |
| 3. |
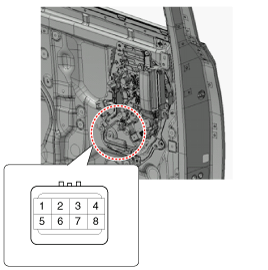
Disconnect the connector from the door latch.
|
| 4. |
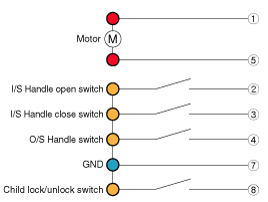
Check actuator operation by connecting power and ground
according to the table. To prevent damage to the actuator, apply battery
voltage only momentarily.
|
| 5. |
Check for continuity between terminals in half latching condition according to the table.
|
Tailgate Lock Module Inspection
| 1. |
Remove the tailgate trim.
(Refer to Body - "Tailgate Trim") |
| 2. |
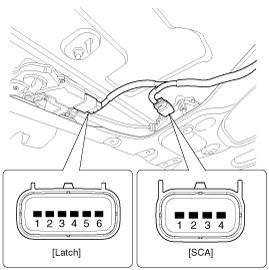
Disconnect the connector from the tailgate latch.
[Latch]
[SCA]
|
Tailgate Open Switch Inspection
| 1. |
Remove the tailgate trim.
(Refer to Body - "Tailgate Trim") |
| 2. |
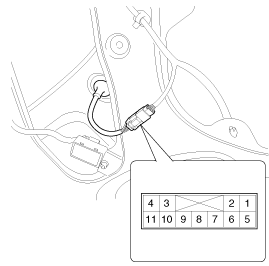
Disconnect the connector from the tailgate open switch.
|
| 3. |
Check for continuity between the terminals and ground according to the table.
|
Door Switch Inspection
| 1. |
Remove the luggage side trim.
(Refer to Body - "Luggage Side Trim") |
| 2. |
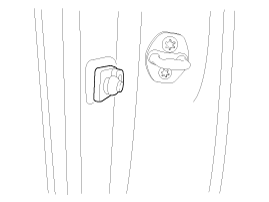
Check for continuity between the terminals and ground according to the table.
|
Hood Switch Inspection
| 1. |
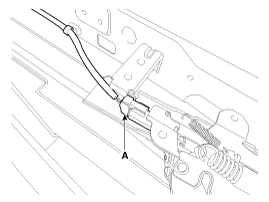
Remove the hood latch assembly.
(Refer to Body - "Hood Latch Assembly") |
| 2. |
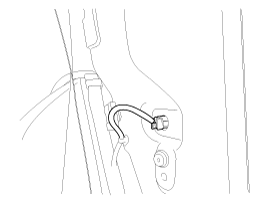
Disconnect the connector (A) from the hood switch.
|
| 3. |
Check for continuity between the terminals and ground according to the table.
|
 Components and Components Location
Component Location
1. DDM (Driver Door Module)2. BCM & RF receiver3. Door lock switch4. Tail gate lock actuator & switch5. Front door lock actuator & switch6. Rear door lock actuator ...
 Power Door Lock Switch Repair procedures
Inspection
Diagnosis With GDS
1.
The body electrical system can be quickly diagnosed for faulty parts using vehicle diagnostic system (GDS).
The diagnostic system (GDS) provides the following in ...
Other Information:
Relay Box (Engine Compartment) Repair procedures
Inspection
1.
Disconnect the negative (-) battery terminal.
2.
Pull out the relay from the engine compartment relay block.
Power Relay (Type A)
Check for continuity between the terminals. ...
Trip Modes (for Type B and C cluster)
To change the trip mode, scroll the TRIP scroll switch (▲/▼/OK) in the trip computer
mode. ...
Categories
- Home
- First Generation
- Second Generation
- Third generation
- Kia Sedona YP 2014-2025 Owners Manual
- Kia Sedona YP 2014-2025 Service Manual
Copyright © www.kisedona.com 2016-2025


