Replacement
Put on gloves to protect your hands.
•
When prying with a flat-tip screwdriver, wrap it with
protective tape, an ...
Other Information:
Curtain Airbag (CAB) Module Repair procedures
Removal
1.
Disconnect the battery negative cable and wait for at least 30 seconds before beginning to work.
2.
Remove the roof trim.
(Refer to Body - "Roof trim assembly")
3.
Disconnect ...
Mode Control Actuator Description and Operation
Description
Located in the heater unit, the mode control actuator adjusts
the position of the mode door by operating the mode control actuator
according to the signal from the A/C control unit. ...
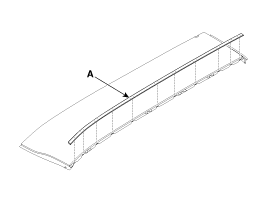
 Kia Sedona: Roof Side Moulding Repair procedures


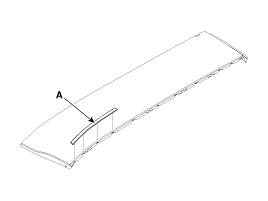
 Roof Rack Repair procedures
 Rear Spoiler Repair procedures