 Kia Sedona: Rear Lower Arm Repair procedures
Third generation YP (2014-2026) / Kia Sedona YP Service Manual / Suspension System / Rear Suspension System / Rear Lower Arm Repair procedures
| Removal |
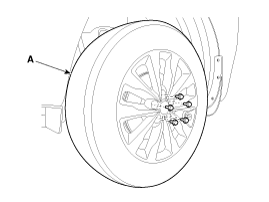
| 1. |
Remove the rear wheel and tire (A) from rear hub.
|

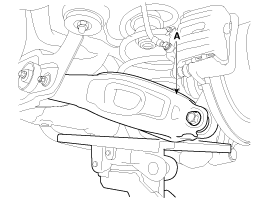
| 2. |
Support the rear lower arm (A) with a jack as shown in the illustration.
|

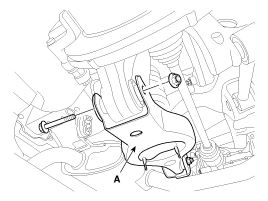
| 3. |
Loosen the bolt & nut and then remove the rear lower arm (A) from the rear axle.
|
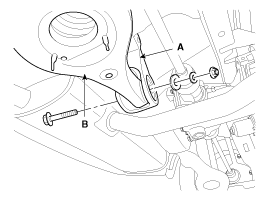
| 4. |
Loosen the bolt & nut and then remove the rear lower arm (B) from the sub frame (A).
|
| 5. |
Install in the reverse order of removal. |
| 6. |
Check the rear alignment.
(Refer to Rear Suspension System - "Rear Alignment") |
| Inspection |
| 1. |
Check the bushing for wear and deterioration. |
| 2. |
Check the rear lower arm for deformation. |
 Rear Upper Arm Repair procedures
Removal
1.
Remove the rear wheel and tire (A) from rear hub.
Tightening torque:
88.2 ~ 107.8 N.m (9.0 ~ 11.0 kgf.m, 65.0 ~ 79.5 lb-ft)
Be careful not to damage ...
 Rear Coil Spring Repair procedures
Removal
1.
Remove the rear wheel and tire (A) from rear hub.
Tightening torque :
88.2 ~ 107.8 N.m (9.0 ~ 11.0 kgf.m, 65.0 ~ 79.5 lb-ft)
Be careful not to damage ...
Other Information:
Power Sliding Door (PSD) Control Module Repair procedures
Removal
1.
Disconnect the negative (-) battery terminal.
2.
Remove the luggage side trim [LH].
(Refer to Body - "Luggage Side Trim")
3.
Disconnect the power sliding door control module co ...
Multi Box Components and Components Location
Component Location
1. Multi box
...
Categories
- Home
- First Generation
- Second Generation
- Third generation
- Kia Sedona YP 2014-2026 Owners Manual
- Kia Sedona YP 2014-2026 Service Manual

Copyright © www.kisedona.com 2016-2026