 Kia Sedona: Seat Heater Switch Repair procedures
Third generation YP (2014-2026) / Kia Sedona YP Service Manual / Body Electrical System / Seat Electrical / Seat Heater Switch Repair procedures
| Removal |
First Row Seat
| 1. |
Disconnect the negative (-) battery terminal. |
| 2. |
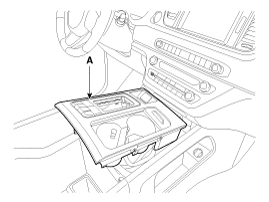
Remove the console upper cover (A).
(Refer to Body - "Floor Console Assembly")
|
| 3. |
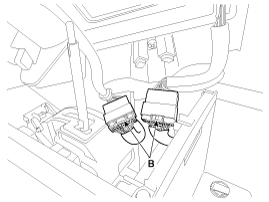
Disconnect the multimedia connectors (A) and main connectors (B).
|
| 4. |
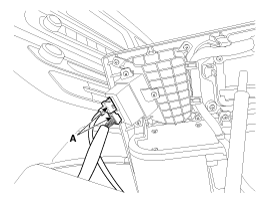
Disconnect the front seat heater switch connector (A) from console upper cover.
|
| 5. |
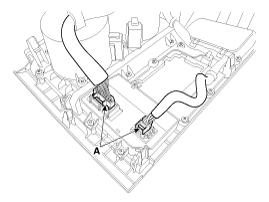
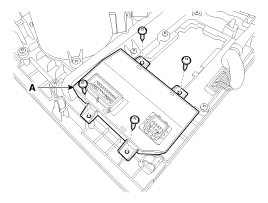
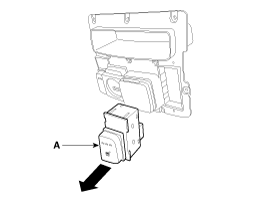
Remove the front seat heater switch (A) after loosening the screws.
|
Second Row Seat
| 1. |
Disconnect the negative (-) battery terminal. |
| 2. |
Remove the rear console cover.
(Refer to Body - "Rear Console Cover") |
| 3. |
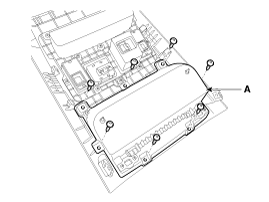
Remove the floor console tray (A) after loosening the screws.
|
| 4. |
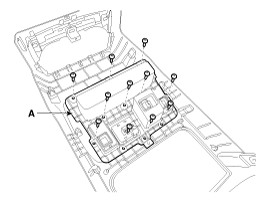
Remove the rear console switch panel (A) after loosening the screws.
|
| 5. |
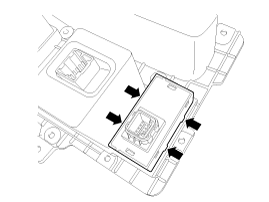
Remove the second row seat heater switch (A) by pushing the hooks.
|
| Installation |
First Row Seat
| 1. |
Install the first row seat heater switch. |
| 2. |
Connect the first row seat heater switch connector. |
| 3. |
Connect the console upper cover connector. |
| 4. |
Install the console upper cover. |
| 5. |
Connect the negative (-) battery terminal. |
Second Row Seat
| 1. |
Install the second row seat heater switch. |
| 2. |
Install the rear console switch panel. |
| 3. |
Install the floor console tray. |
| 4. |
Install the rear console cover. |
| 5. |
Connect the negative (-) battery terminal. |
 Seat Heater Switch Schematic Diagrams
Circuit Diagram
[First Row Seat]
[Second Row Seat]
...
 Climate Seat Unit Components and Components Location
Components
...
Other Information:
Driver Airbag (DAB) Module and Clock Spring Description and Operation
Description
Driver Airbag (DAB) is installed in the steering wheel and
electrically connected to SRSCM via the clock spring. It protects the
driver by deploying the airbag when frontal crash oc ...
Front Wheel Speed Sensor Repair procedures
Removal
1.
Remove the front wheel and tire.
Tightening torque:
88.3 ~ 107.9 N.m (9.0 ~ 11.0 kgf.m, 65.1 ~ 79.6 lb-ft)
2.
Remove the front wheel speed sensor mounting bolt (A).
Tighten ...
Categories
- Home
- First Generation
- Second Generation
- Third generation
- Kia Sedona YP 2014-2026 Owners Manual
- Kia Sedona YP 2014-2026 Service Manual
Copyright © www.kisedona.com 2016-2026

