 Kia Sedona: Rear Door Trim Repair procedures
Third generation YP (2014-2026) / Kia Sedona YP Service Manual / Body (Interior and Exterior) / Rear Door / Rear Door Trim Repair procedures
| Replacement |
Put on gloves to protect your hands. |

|

| 1. |
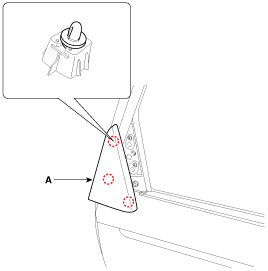
Using a screwdriver or remover, remove the rear door delta inner cover (A).
|
| 2. |
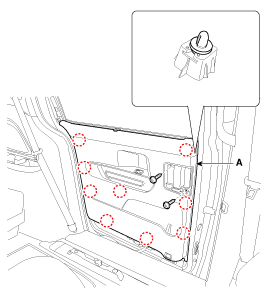
After loosening the mounting screw, remove the rear door trim (A).
|

| 3. |
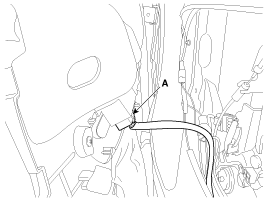
Disconnect the power window switch connector (A).
|
| 4. |
Install in the reverse order of removal.
|

 Rear Door Trim Components and Components Location
Component Location
1. Rear door trim
...
 Rear Door Curtain Assembly Repair procedures
Replacement
Put on gloves to protect your hands.
•
When prying with a flat-tip screwdriver, wrap it with
protective tape, and ...
Other Information:
Repair procedures
Service Point Target Auto Calibration (SPTAC)
This procedure provides a way to calibrate the camera by
having the service technician align the car to a well lit simulated
straight road target; ...
Oil Pump Repair procedures
Removal and Installation
1.
Drain engine oil.
(Refer to Lubrication System - "Engine Oil")
2.
Remove the engine room under cover.
(Refer to Engine And Transaxle Assembly - "Engine Room Under ...
Categories
- Home
- First Generation
- Second Generation
- Third generation
- Kia Sedona YP 2014-2026 Owners Manual
- Kia Sedona YP 2014-2026 Service Manual

Copyright © www.kisedona.com 2016-2026