 Kia Sedona: Rear Door Outside Handle Repair procedures
Third generation YP (2014-2026) / Kia Sedona YP Service Manual / Body (Interior and Exterior) / Rear Door / Rear Door Outside Handle Repair procedures
| Replacement |
| 1. |
Remove the rear door trim.
(Refer to Rear Door - "Rear Door Trim") |
| 2. |
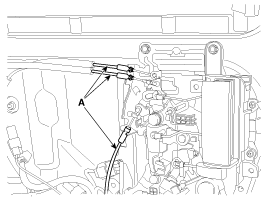
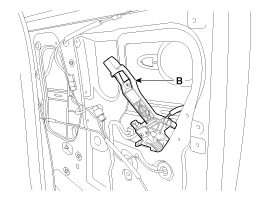
Disconnect the rear door cable (A).
|
| 3. |
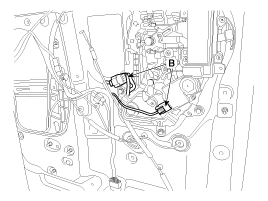
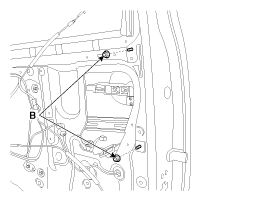
Disconnect the rear door remote controller connector (B).
|
| 4. |
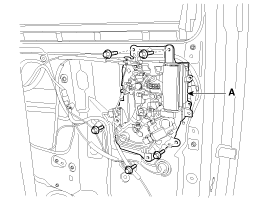
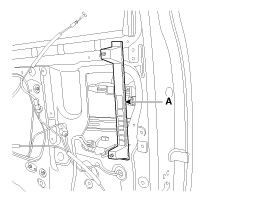
Loosen the bolts and remove the rear door remote controller (A).
|
| 5. |
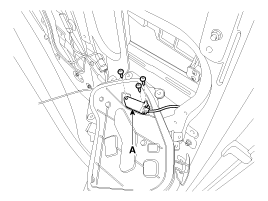
Loosen the screw and disconnect the rear door outside handle cable (A).
|
| 6. |
Loosen the nuts (B) and remove the rear door front channel (A).
|
| 7. |
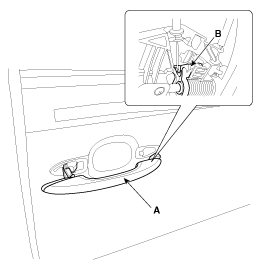
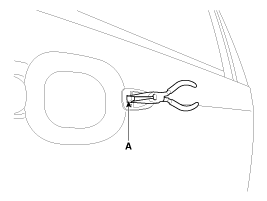
Separate the fixed pin (B) and remove the rear door outside handle cover (A).
|
| 8. |
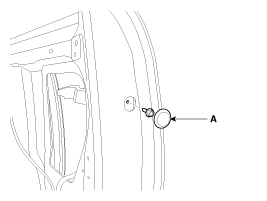
Separate plug hole (A) and then remove the bolt.
|
| 9. |
Press the fixed pin and then remove the rear door outside handle base (A).
|
| 10. |
Install in the reverse order of removal.
|
 Rear Door Outside Handle Components and Components Location
Component Location
1. Rear door outside handle
...
 Rear Door Latch Components and Components Location
Component Location
1. Rear door front latch2. Rear door rear latch
...
Other Information:
Schematic Diagrams
System Block Diagram
Component Parts And Function Outline
Component partFunctionVehicle-speed sensor, ESP/ABS Control ModuleConverts vehicle speed to pulse.ECMReceives signals from sensor and co ...
Cluster Ionizer (DATC only) Repair procedures
Inspection
1.
Press the MODE switch more than 4 times within 2 seconds while pressing the OFF switch.
DisplayFail description00Normal50Cluster ion generator fault
* For diagnostic procedur ...
Categories
- Home
- First Generation
- Second Generation
- Third generation
- Kia Sedona YP 2014-2026 Owners Manual
- Kia Sedona YP 2014-2026 Service Manual
Copyright © www.kisedona.com 2016-2026

