 Kia Sedona: Rear Console Cover Repair procedures
Third generation YP (2014-2026) / Kia Sedona YP Service Manual / Body (Interior and Exterior) / Floor Console / Rear Console Cover Repair procedures
| Replacement |
|

|

| 1. |
Remove the floor console assembly.
(Refer to Floor Console - "Floor Console Assembly") |
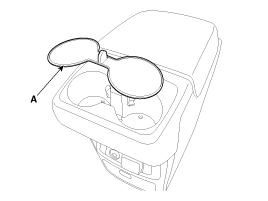
| 2. |
Remove the rear console cup mat (A).
|
| 3. |
Loosen the screw and remove the cup holder case (A).
|

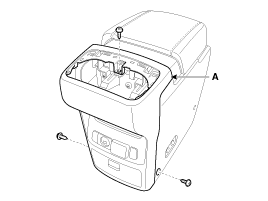
| 4. |
Loosen the screw and remove the rear console cover (A).
|
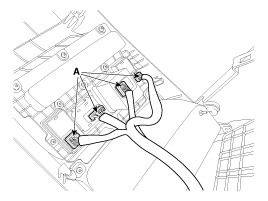
| 5. |
Press the locking pin and disconnect the connectors (A).
|
| 6. |
Install in the reverse order of removal.
|

 Rear Console Cover Components and Components Location
Component Location
1. Rear console cover
...
 Console Armrest Components and Components Location
Component Location
1. Console armrest
...
Other Information:
Rear Door Belt Outside Weatherstrip Repair procedures
Replacement
1.
Pull down rear door window glass by pressing the power window glass switch.
2.
After loosening the mounting screws, remove the rear door belt outside weatherstrip (A).
3.
In ...
Engine Oil and Filter Repair procedures
Inspection
Engine Oil Level
Be sure that the vehicle is on level ground.
1.
Warm up and stop the engine, and then wait for 5 minutes.
2.
Turn the engine off an ...
Categories
- Home
- First Generation
- Second Generation
- Third generation
- Kia Sedona YP 2014-2026 Owners Manual
- Kia Sedona YP 2014-2026 Service Manual

Copyright © www.kisedona.com 2016-2026