
 Kia Sedona: Mode selection
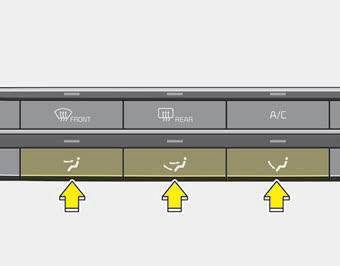
The mode selection button controls the direction of the air flow through the ventilation system.
Air can be directed to the floor, dashboard outlets, or windshield. Six symbols are used to represent MAX A/C, Face, Bi-Level, Floor, Floor- Defrost and Defrost air position.
The MAX A/C mode is used to cool the inside of the vehicle faster.
Face-Level (A, B, D)

Air flow is directed toward the upper body and face. Additionally, each outlet can be controlled to direct the air discharged from the outlet.
Bi-Level (A, B, C, D, E)

Air flow is directed towards the face and the floor.
Floor-Level (A, C, D, E)

Most of the air flow is directed to the floor, with a small amount of the air being directed to the windshield and side window defrosters.
Floor/Defrost-Level (A, C, D, E)

Most of the air flow is directed to the floor and the windshield with a small amount directed to the side window defrosters.
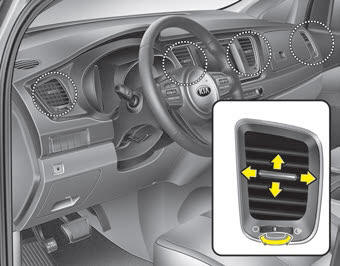
Instrument panel vents
The outlet vents can be opened or closed separately using the thumbwheel (if equipped).
Also, you can adjust the direction of air delivery from these vents using the vent control lever as shown.
 Heating and air conditioning
1. Start the engine.
2. Set the mode to the desired position. For improving the effectiveness of heating
and cooling;
- Heating:
- Cooling:
3. Set the temperature control to the desired positi ...
 Temperature control
The temperature control knob allows you to control the temperature of the air
flowing from the ventilation system. To change the air temperature in the passenger
compartment, turn the knob to th ...
Other Information:
Child restraint system
Children riding in the vehicle should sit in the rear seat and must always be
properly restrained to minimize the risk of injury in an accident, sudden stop or
sudden maneuver.
According to accid ...
Front Door Belt Inside Weatherstrip Repair procedures
Replacement
1.
Remove the front door trim.
(Refer to Front Door - "Front Door Trim")
2.
Remove the front door belt inside weatherstrip (A).
3.
Install in the reverse order of removal.
...
Categories
- Home
- First Generation
- Second Generation
- Third generation
- Kia Sedona YP 2014-2026 Owners Manual
- Kia Sedona YP 2014-2026 Service Manual
