 Kia Sedona: Hood Latch Repair procedures
Third generation YP (2014-2026) / Kia Sedona YP Service Manual / Body (Interior and Exterior) / Hood / Hood Latch Repair procedures
| Replacement |
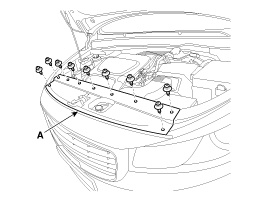
| 1. |
Loosen the fastener and remove the front bumper upper cover (A).
|
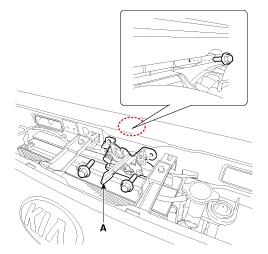
| 2. |
Remove the hood lower latch assembly (A) mounting bolts.
|
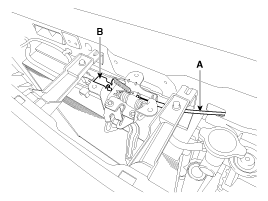
| 3. |
Disconnect the hood latch release handle cable (A) and connector (B).
|
| 4. |
Install in the reverse order of removal.
|

 Hood Latch Components and Components Location
Component Location
1. Hood lower latch assembly
...
 Tail Gate
...
Other Information:
Checking the coolant level
WARNING - Removing radiator cap
Never attempt to remove the radiator cap while the engine is operating or
hot. Doing so might lead to cooling system and engine damage and could result in
se ...
Emergency tailgate safety release
Your vehicle is equipped with an emergency tailgate safety release lever located
on the bottom of the tailgate. When someone is inadvertently locked in the cargo
area, the tailgate can be opened ...
Categories
- Home
- First Generation
- Second Generation
- Third generation
- Kia Sedona YP 2014-2026 Owners Manual
- Kia Sedona YP 2014-2026 Service Manual

Copyright © www.kisedona.com 2016-2026