 Kia Sedona: Fuel Tank Repair procedures
Third generation YP (2014-2026) / Kia Sedona YP Service Manual / Engine Control / Fuel System / Fuel Delivery System / Fuel Tank Repair procedures
| Removal |
| 1. |
Release the residual pressure in fuel line.
(Refer to the Fuel Delivery System - Repair Procedures - "Release Residual Pressure in Fuel Line") |
| 2. |
Turn the ignition switch OFF and disconnect the negative (-) battery terminal. |
| 3. |
Remove the second row seat LH
(Refer to Body - "Rear Seat Assembly") |
| 4. |
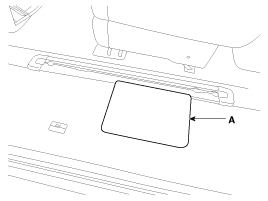
Open the floor mat (A).
|
| 5. |
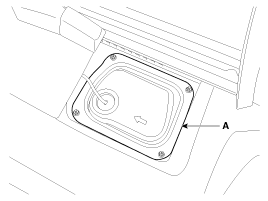
Remove the fuel pump service cover (A).
|
| 6. |
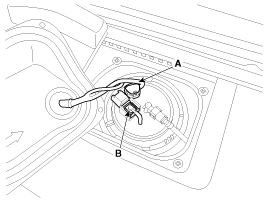
Disconnect the fuel pump connector (A) and fuel tank pressure sensor (B).
|
| 7. |
Lift the vehicle. |
| 8. |
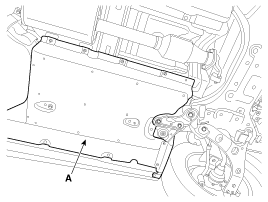
Remove the under cover LH (A).
|
| 9. |
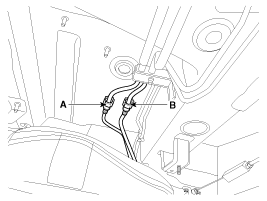
Disconnect the fuel feed tube quick-connector (A) and vapor tube quick-connector (B).
|
| 10. |
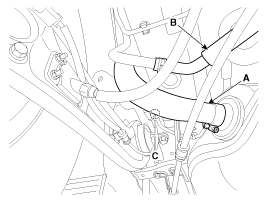
Disconnect the fuel filler hose (A), ventilation hose (B) and canister close valve connector (C).
|
| 11. |
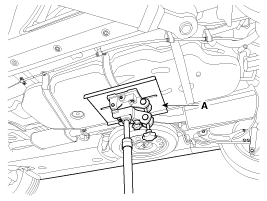
Support the fuel tank with jack (A).
|
| 12. |
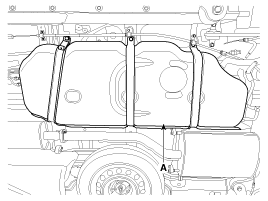
Remove the mounting bolts and fuel tank bands, and then remove the fuel tank (A).
|
| Installation |
| 1. |
Install in the reverse order of removal.
|
 Repair procedures
Fuel Pressure Test (Low pressure system)
1.
Release the residual pressure in fuel line.
(Refer to the Fuel Delivery System - Repair Procedures - "Release Residual Pressure in Fuel Line").
...
 Fuel Pump Repair procedures
Inspection
[Fuel pump]
1.
Turn the ignition switch OFF, and then remove battery (-) terminal.
2.
Remove the fuel pump assembly.
(Refer to Fuel Pump - "Removal")
3.
Check that motor ope ...
Other Information:
Heated Oxygen Sensor (HO2S) Repair procedures
Inspection
1.
Turn the ignition switch OFF.
2.
Disconnect the HO2S connector.
3.
Measure resistance between the HO2S terminals 3 and 4.
4.
Check that the resistance is within the speci ...
Before entering vehicle
Be sure that all windows, outside mirror(s), and outside lights are clean.
Check the condition of the tires.
Check under the vehicle for any sign of leaks.
Be sure there are no obstacles behi ...
Categories
- Home
- First Generation
- Second Generation
- Third generation
- Kia Sedona YP 2014-2026 Owners Manual
- Kia Sedona YP 2014-2026 Service Manual
Copyright © www.kisedona.com 2016-2026

