 Kia Sedona: Cooling Fan Repair procedures
Third generation YP (2014-2026) / Kia Sedona YP Service Manual / Engine Mechanical System / Cooling System / Cooling Fan Repair procedures
| Removal and Installation |
| 1. |
Disconnect the battery negative terminal. |
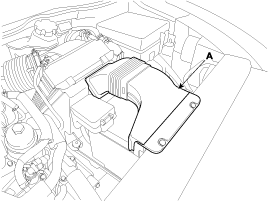
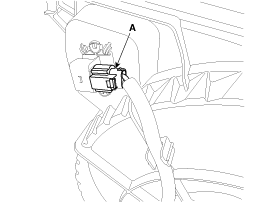
| 2. |
Remove the air duct (A).
|
| 3. |
Remove the front bumper cover.
(Refer to Body - "Front Bumper Cover") |
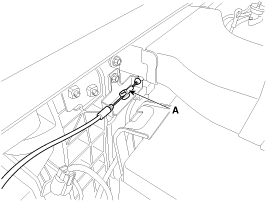
| 4. |
Disconnect the hood latch cable (A).
|
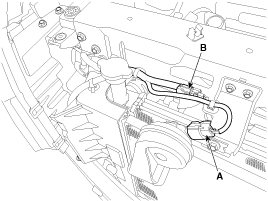
| 5. |
Disconnect the horn connector (A) and hood latch connector (B).
|
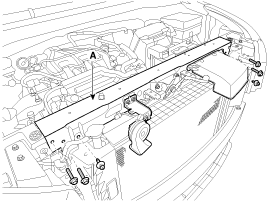
| 6. |
Remove the radiator upper member assembly (A).
|
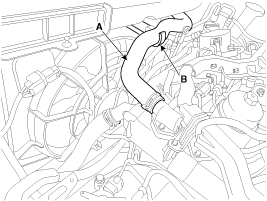
| 7. |
Separate the radiator upper hose (A) from the hose fixing bracket (B).
|
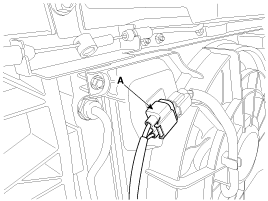
| 8. |
Disconnect the cooling fan connector.
|
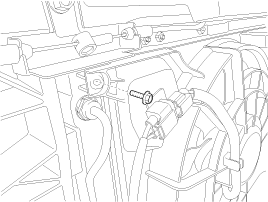
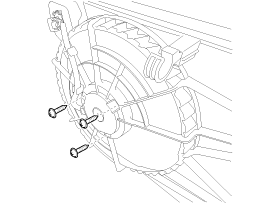
| 9. |
Remove the cooling fan mounting bolt.
[LH]
[RH]
|
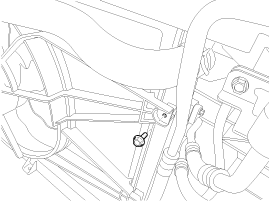
| 10. |
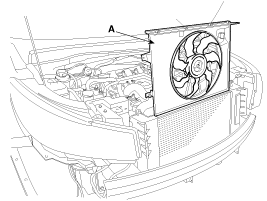
Remove the cooling fan assembly (A) from the vehicle.
|
| 11. |
Install in the reverse order of removal. |
Resistor
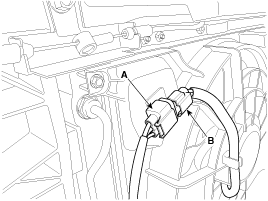
| 1. |
Disconnect the wire harness connector (A) and the fan motor connector (B).
|
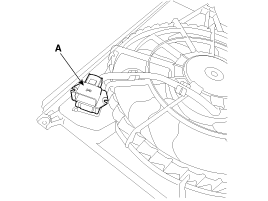
| 2. |
Remove the resistor (A) from the cooling fan shroud.
|
| 3. |
Install in the reverse order of removal. |
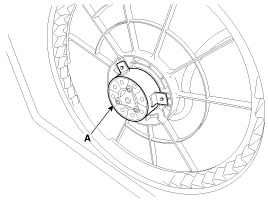
| Disassembly |
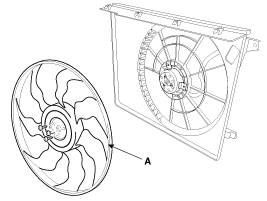
| 1. |
Remove the cooling fan (A) from the cooling fan assembly.
|
| 2. |
Disconnect the fan motor connector (A) from the resistor.
|
| 3. |
Remove the fan motor (A) from the cooling fan shroud.
|
| 4. |
Install in the reverse order of removal. |
 Cooling Fan Schematic Diagrams
Circuit Diagram
...
 Radiator Components and Components Location
Components
1. Radiator2. Radiator lower mounting insulator3. Radiator upper mounting bracket (LH)4. Radiator upper mounting bracket (RH)5. Radiator upper hose6. Radiator lower hose7. Radiator c ...
Other Information:
Hood Insulator Pad Repair procedures
Replacement
1.
Using a clip remover, detach the clips, and remove the hood insulator pad (A).
•
Be careful not to scratch the hood panel.
2.
Install ...
Components and Components Location
Components
1. Crash pad side cover [LH]2. Steering column shroud lower panel3. Crash pad lower panel4. Knee bolster panel5. Glove box6. Crash pad side cover [RH]7. Main crash pad assembly
...
Categories
- Home
- First Generation
- Second Generation
- Third generation
- Kia Sedona YP 2014-2026 Owners Manual
- Kia Sedona YP 2014-2026 Service Manual

Copyright © www.kisedona.com 2016-2026