 Kia Sedona: Hood Latch Repair procedures
Third generation YP (2014-2024) / Kia Sedona YP Service Manual / Body (Interior and Exterior) / Hood / Hood Latch Repair procedures
| Replacement |
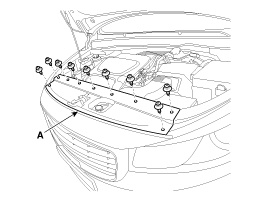
| 1. |
Loosen the fastener and remove the front bumper upper cover (A).
|
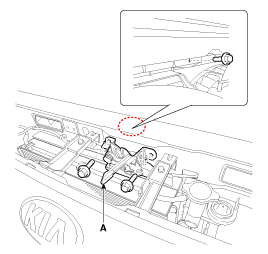
| 2. |
Remove the hood lower latch assembly (A) mounting bolts.
|
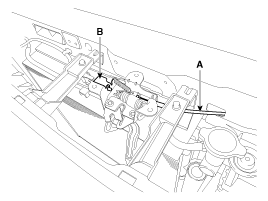
| 3. |
Disconnect the hood latch release handle cable (A) and connector (B).
|
| 4. |
Install in the reverse order of removal.
|

 Hood Latch Components and Components Location
Component Location
1. Hood lower latch assembly
...
 Tail Gate
...
Other Information:
LCD Display Control
Type A
The LCD display modes can be changed by using the control buttons on the steering
wheel.
[Type A]
(1) ▲ / ▼ : TRIP scroll switch for changing trip modes
(2) RESET : RESET bu ...
Relay Box (Passenger Compartment) Repair procedures
Fuse Inspection
1.
Be sure that there are no loose fuse holders and that the fuses are held securely.
2.
Is the fuse capacity correct for each circuit?
3.
Are there any blown fuses?
...
Categories
- Home
- First Generation
- Second Generation
- Third generation
- Kia Sedona YP 2014-2024 Owners Manual
- Kia Sedona YP 2014-2024 Service Manual
Copyright © www.kisedona.com 2016-2024