 Kia Sedona: MTS Control Unit Repair procedures
Third generation YP (2014-2026) / Kia Sedona YP Service Manual / Body Electrical System / MTS System / MTS Control Unit Repair procedures
| Removal |
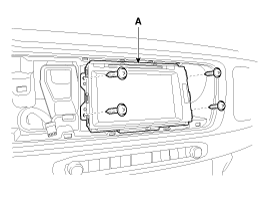
[AVN Type]
|

| 1. |
Disconnect the negative (-) battery terminal. |
| 2. |
Remove the center fascia upper panel.
(Refer to Body - "Center Fascia Panel") |
| 3. |
Remove the AVN head unit (A) after loosening the screws.
|
| 4. |
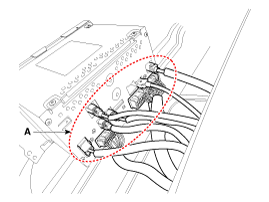
Disconnet the AVN head unit connectors (A).
|

[UVO AUDIO + MTS Type]
| 1. |
Disconnect the negative (-) battery terminal. |
| 2. |
Remove the cluster.
(Refer to Indicators And Gauges - "Instrument Cluster") |
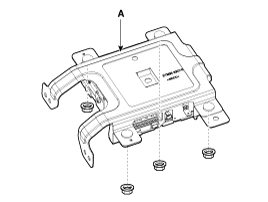
| 3. |
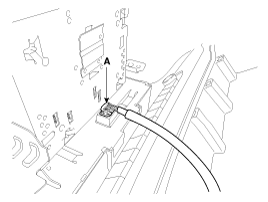
Disconnect the MTS unit connectors (A).
|
| 4. |
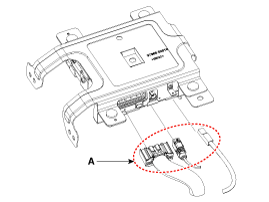
Remove the MTS unit (A) after loosening the nuts.
|
| Installation |
[AVN Type]
| 1. |
Connect the AVN head unit connector. |
| 2. |
Install the AVN head unit. |
| 3. |
Install the center fascia upper panel. |
| 4. |
Connect the negative (-) battery terminal.
|

[UVO AUDIO + MTS Type]
| 1. |
Install the MTS unit. |
| 2. |
Connect the MTS unit connector. |
| 3. |
Install the cluster. |
| 4. |
Connect the negative (-) battery terminal. |
| Inspection |
| Diagnosis With GDS |
| 1. |
The body electrical system can be quickly diagnosed for
faulty parts using vehicle diagnostic system (GDS). The diagnostic
system (GDS) provides the following information:
|
| 2. |
Select the ''Car model'' and the system to be checked in order to check the vehicle with the tester. |
| 3. |
Select the ''Telematics Unit (TMU)'' to check the telematics unit. |
| 4. |
Select the ''Current Data" menu to search the current state of the input/output data.
The input/output data for the sensors corresponding to the TMU can be checked.
|
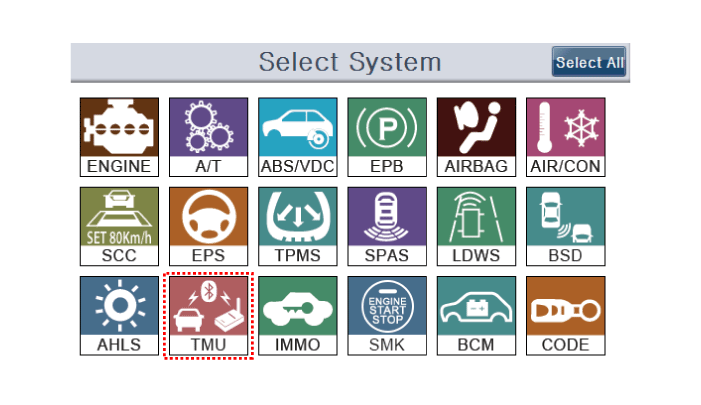
| 5. |
To check the DTC of the TMU, select "Diagnostic trouble codes". |
 MTS Control Unit Components and Components Location
Component (Only for the audio TMU System)
The UVO unit for AVN is integrated in the AVN head unit. ...

Other Information:
Schematic Diagrams
Circuit Diagram
1.
Connector terminal
TypePin NoDescriptionBattery1Battery -2Battery +Vehicle1-2-3-4-5-6-7IGN8High_CAN9Low_CAN10-11-12-
2.
Circuit Diagram ...
Schematic Diagrams
Schematic Diagram
Canister
Canister is filled with charcoal and absorbs evaporated vapor
in fuel tank. The gathered fuel vapor in canister is drawn into the
intake manifold by the ECM/PCM when ...
Categories
- Home
- First Generation
- Second Generation
- Third generation
- Kia Sedona YP 2014-2026 Owners Manual
- Kia Sedona YP 2014-2026 Service Manual

Copyright © www.kisedona.com 2016-2026