 Kia Sedona: AC Inverter Outlet Repair procedures
Third generation YP (2014-2026) / Kia Sedona YP Service Manual / Body Electrical System / AC Inverter System / AC Inverter Outlet Repair procedures
| Removal |
[Outlet 1 - Console]
| 1. |
Disconnect the negative (-) battery terminal. |
| 2. |
Remove the rear console cover.
(Refer to Body - "Rear Console Cover") |
| 3. |
Remove the floor console tray (A) after loosening the screws.
|
| 4. |
Remove the rear console switch panel (A) after loosening the screws.
|
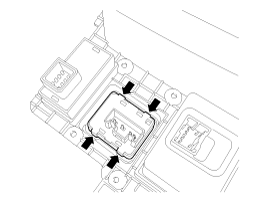
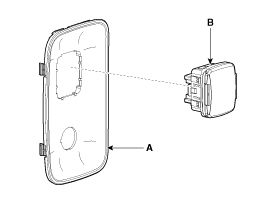
| 5. |
Remove the AC inverter outlet switch (A) after pushing the mounting hooks.
|

[Outlet 2 - Trunk]
| 1. |
Disconnect the negative (-) battery terminal. |
| 2. |
Remove the power outlet cover (A) from the right luggage side trim. |
| 3. |
Disconnect the power outlet connector (B) and AC inverter outlet connector (C).
|
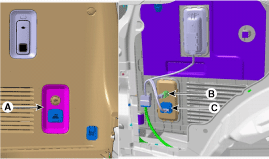
| 4. |
Remove the AC inverter outlet switch (B) from the power outlet cover (A).
|
| Installation |
[Outlet 1 - Console]
| 1. |
Install the AC inverter outlet switch. |
| 2. |
Install the rear console switch panel. |
| 3. |
Install the floor console tray. |
| 4. |
Install the rear console cover. |
| 5. |
Connect the negative (-) battery terminal. |
[Outlet 2 - Trunk]
| 1. |
Install the AC inverter outlet switch. |
| 2. |
Connect the power outlet connector and AC inverter outlet connector. |
| 3. |
Install the power outlet cover . |
| 4. |
Connect the negative (-) battery terminal. |
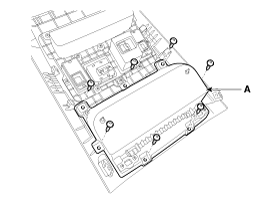
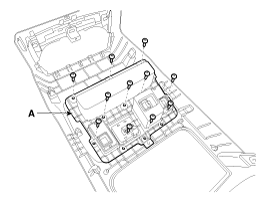
 AC Inverter Unit Repair procedures
Removal
1.
Disconnect the negative (-) battery terminal.
2.
Remove the rear console assembly.
(Refer to Body - "Floor Console Assembly")
3.
Disconnect the AC inverter unit connector (A).
...
 AC Inverter Switch Repair procedures
Removal
1.
Disconnect the negative (-) battery terminal.
2.
Remove the crash pad lower panel.
(Refer to Body - "Crash Pad Lower Panel")
3.
Remove the crash pad lower switch (A) after loos ...
Other Information:
Fan speed control
The ignition switch must be in the ON position for fan operation.
The fan speed control knob allows you to control the fan speed of the air flowing
from the ventilation system. To change the fan ...
Certification label
The certification label is located on the driver's door sill at the center pillar.
This label shows the maximum allowable weight of the fully loaded vehicle. This
is called the GVWR (Gross Vehi ...
Categories
- Home
- First Generation
- Second Generation
- Third generation
- Kia Sedona YP 2014-2026 Owners Manual
- Kia Sedona YP 2014-2026 Service Manual

Copyright © www.kisedona.com 2016-2026