 Kia Sedona: Rear Bumper beam Assembly Repair procedures
Third generation YP (2014-2026) / Kia Sedona YP Service Manual / Body (Interior and Exterior) / Rear Bumper / Rear Bumper beam Assembly Repair procedures
| Replacement |
|

Take care not to bend or scratch the trim and panels. |

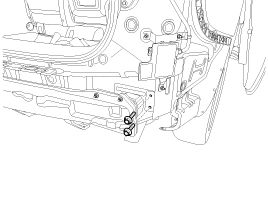
| 1. |
Remove the rear bumper cover.
(Refer to Rear Bumper - "Rear Bumper Cover") |
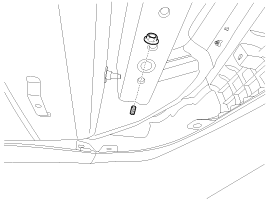
| 2. |
Loosen the rear bumper under side mounting nuts.
[LH]
[RH]
|
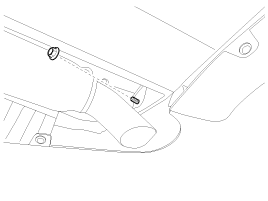
| 3. |
Loosen the rear bumper beam mounting bolts.
[LH]
[RH]
|

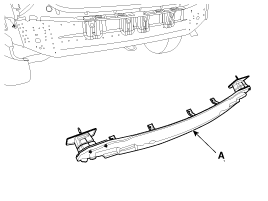
| 4. |
Remove the rear bumper beam assembly (A).
|
| 5. |
Install in the reverse order of removal.
|

 Rear Bumper beam Assembly Components and Components Location
Component Location
1. Rear Bumper Beam Assembly
...
 Front Seat
...
Other Information:
Power Seat Control Switch Schematic Diagrams
Circuit Diagram
...
General Information
Warning And Caution Labels
1. Fan caution2. Radiator cap caution3. Battery caution
Battery Caution Label
Warning / Caution Label (Cont''d)
A.Keep lighted cigarettes and all other flames or ...
Categories
- Home
- First Generation
- Second Generation
- Third generation
- Kia Sedona YP 2014-2026 Owners Manual
- Kia Sedona YP 2014-2026 Service Manual

Copyright © www.kisedona.com 2016-2026