 Kia Sedona: Repair procedures
Third generation YP (2014-2026) / Kia Sedona YP Service Manual / Body (Interior and Exterior) / Floor Carpet / Repair procedures
| Replacement |
[Front]
Put on gloves to protect your hands. |

|

| 1. |
Remove the front seat assembly.
(Refer to Front Seat - "Front Seat Assembly") |
| 2. |
Remove the second row seat.
(Refer to Rear Seat - "Rear Seat Assembly") |
| 3. |
Remove the third row seat.
(Refer to Rear Seat - "Rear Seat Assembly") |
| 4. |
Remove the door scuff trim.
(Refer to Interior Trim - "Door Scuff Trim") |
| 5. |
Remove the front door scuff trim.
(Refer to Interior Trim - "Door Scuff Trim") |
| 6. |
Remove the rear door scuff trim.
(Refer to Interior Trim - "Door Scuff Trim") |
| 7. |
Remove the cowl side trim.
(Refer to Interior Trim - "Cowl Side Trim") |
| 8. |
Remove the luggage side trim.
(Refer to Interior Trim - "Luggage Side Trim") |
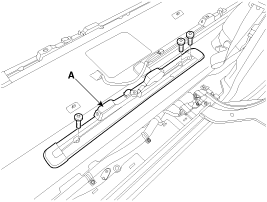
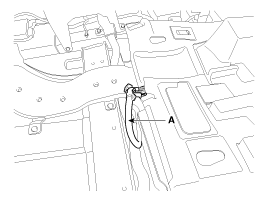
| 9. |
Loosen the screws and remove the rear seat rail (A).
|
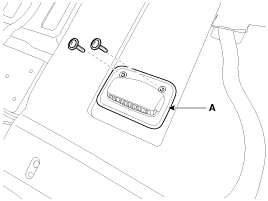
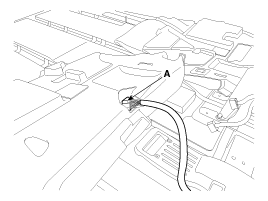
| 10. |
Loosen the screw and remove the rear duct cover (A).
|
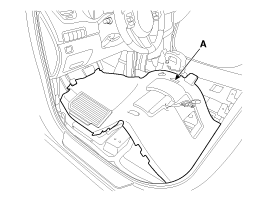
| 11. |
First remove the front side of front carpet (A).
[Driver''s]
[Passenger''s]
|
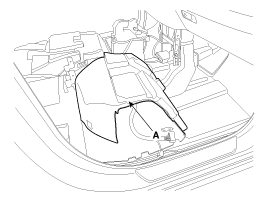
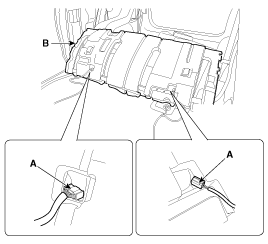
| 12. |
Pass the front seat main wiring (A) to carpet hole and then remove the center side of front carpet.
[Driver''s]
[Passenger''s]
|
| 13. |
Pass the second row seat main wiring (A) to carpet hole and then remove the front carpet (B).
|
| 14. |
Install in the reverse order of removal.
|

[Rear]
Put on gloves to protect your hands. |
|
| 1. |
Remove the luggage side trim.
(Refer to Interior Trim - "Luggage Side Trim") |
| 2. |
Remove the rear transverse trim.
(Refer to Interior Trim - " Rear Transverse Trim") |
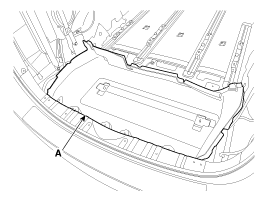
| 3. |
Remove the rear carpet trim (A).
|
| 4. |
Install in the reverse order of removal.
|
 Components and Components Location
Components
[Front]
1. Front carpet
[Rear]
1. Rear carpet
...
 Front Bumper
...
Other Information:
Blower Unit Repair procedures
Replacement
1.
Disconnect the negative (-) battery terminal.
2.
Recover the refrigerant with a recovery/recycling/charging station.
3.
When the engine is cool, drain the engine coolant fro ...
Front Bumper Cover Repair procedures
Replacement
•
When prying with a flat-tip screwdriver, wrap it with
protective tape, and apply protective tape around the related parts, to
prevent damage. ...
Categories
- Home
- First Generation
- Second Generation
- Third generation
- Kia Sedona YP 2014-2026 Owners Manual
- Kia Sedona YP 2014-2026 Service Manual

Copyright © www.kisedona.com 2016-2026