Replacement
1.
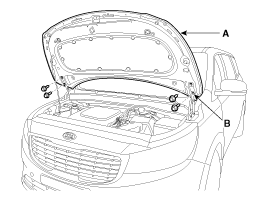
Using a clip remover, detach the clips, and remove the hood insulator pad (A).
•
Be careful not to scratch the hood panel.
2.
Install ...
Other Information:
Limitations of the System
The Forward Collision Warning System may have limits to its ability to detect
distance to the vehicle ahead due to road and traffic conditions.
The FCW could not detect vehicle or could detect obje ...
Cylinder Head Cover Repair procedures
Removal
[LH Cylinder Head Cover]
1.
Remove the air duct.
(Refer to Intake And Exhaust System - "Air Cleaner")
2.
Remove the battery.
(Refer to Engine Electrical System - "Battery")
3.
...
 Kia Sedona: Hood Assembly Repair procedures

 Hood Assembly Components and Components Location
 Hood Insulator Pad Repair procedures