 Kia Sedona: Repair procedures
Third generation YP (2014-2026) / Kia Sedona YP Service Manual / Body (Interior and Exterior) / Floor Carpet / Repair procedures
| Replacement |
[Front]
Put on gloves to protect your hands. |

|

| 1. |
Remove the front seat assembly.
(Refer to Front Seat - "Front Seat Assembly") |
| 2. |
Remove the second row seat.
(Refer to Rear Seat - "Rear Seat Assembly") |
| 3. |
Remove the third row seat.
(Refer to Rear Seat - "Rear Seat Assembly") |
| 4. |
Remove the door scuff trim.
(Refer to Interior Trim - "Door Scuff Trim") |
| 5. |
Remove the front door scuff trim.
(Refer to Interior Trim - "Door Scuff Trim") |
| 6. |
Remove the rear door scuff trim.
(Refer to Interior Trim - "Door Scuff Trim") |
| 7. |
Remove the cowl side trim.
(Refer to Interior Trim - "Cowl Side Trim") |
| 8. |
Remove the luggage side trim.
(Refer to Interior Trim - "Luggage Side Trim") |
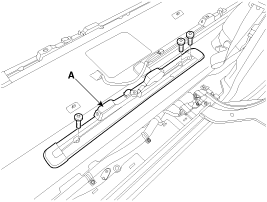
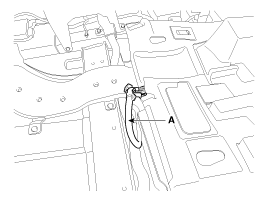
| 9. |
Loosen the screws and remove the rear seat rail (A).
|
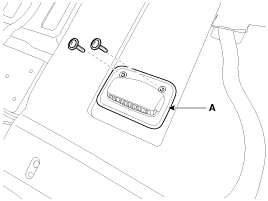
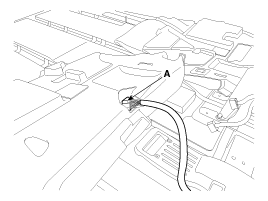
| 10. |
Loosen the screw and remove the rear duct cover (A).
|
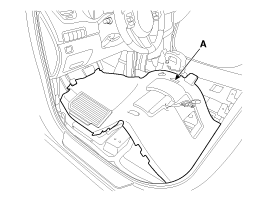
| 11. |
First remove the front side of front carpet (A).
[Driver''s]
[Passenger''s]
|
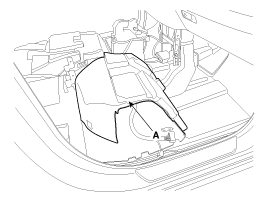
| 12. |
Pass the front seat main wiring (A) to carpet hole and then remove the center side of front carpet.
[Driver''s]
[Passenger''s]
|
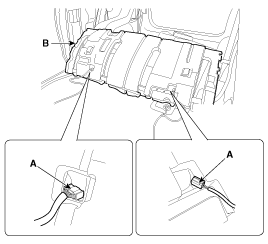
| 13. |
Pass the second row seat main wiring (A) to carpet hole and then remove the front carpet (B).
|
| 14. |
Install in the reverse order of removal.
|

[Rear]
Put on gloves to protect your hands. |
|
| 1. |
Remove the luggage side trim.
(Refer to Interior Trim - "Luggage Side Trim") |
| 2. |
Remove the rear transverse trim.
(Refer to Interior Trim - " Rear Transverse Trim") |
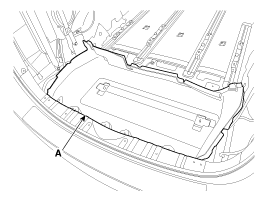
| 3. |
Remove the rear carpet trim (A).
|
| 4. |
Install in the reverse order of removal.
|
 Components and Components Location
Components
[Front]
1. Front carpet
[Rear]
1. Rear carpet
...
 Front Bumper
...
Other Information:
Tire sidewall labeling
This information identifies and describes the fundamental characteristics of
the tire and also provides the tire identification number (TIN) for safety standard
certification. The TIN can be use ...
Fuel Tank Pressure Sensor (FTPS) Repair procedures
Inspection
1.
Connect the GDS to the Data Link Connector (DLC).
2.
Measure the output voltage of the FTPS.
Pressure [kPa (kgf/cm², psi)]Output Voltage (V) [Ref=5V]-6.67 (-0.06, -0.97)0.502 ...
Categories
- Home
- First Generation
- Second Generation
- Third generation
- Kia Sedona YP 2014-2026 Owners Manual
- Kia Sedona YP 2014-2026 Service Manual

Copyright © www.kisedona.com 2016-2026