 Kia Sedona: Floor Console Assembly Repair procedures
Third generation YP (2014-2026) / Kia Sedona YP Service Manual / Body (Interior and Exterior) / Floor Console / Floor Console Assembly Repair procedures
| Replacement |
Put on gloves to protect your hands. |

|

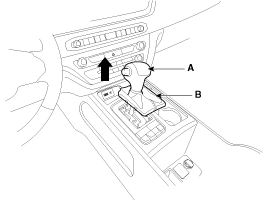
| 1. |
To remove the gear knob (A) and gear boots (B), pull them up altogether.
|
| 2. |
Using a screwdriver or remover, remove the floor console upper cover (A).
|

| 3. |
Disconnect the connectors (A) from the floor console upper cover.
|
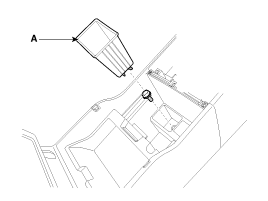
| 4. |
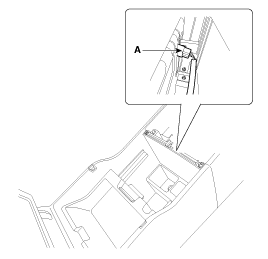
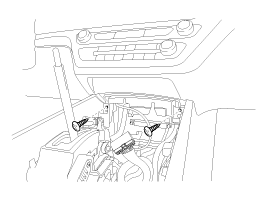
Remove the sunglasses case (A) and then loosen the bolt.
|
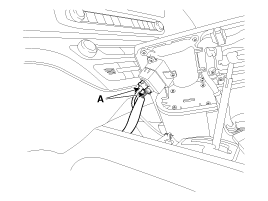
| 5. |
Loosen the screw and disconnect the console main connector (A).
|
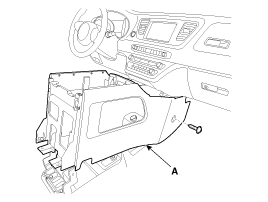
| 6. |
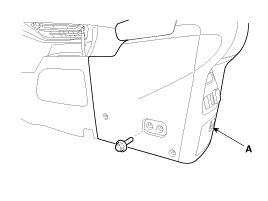
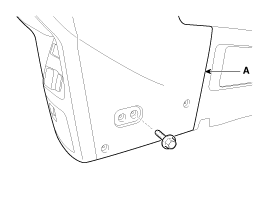
Loosen the mounting bolts and remove the console assembly (A).
[LH]
[RH]
|
| 7. |
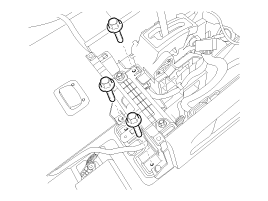
Loosen the console mounting bolts.
|
| 8. |
Loosen the console mounting screws.
|
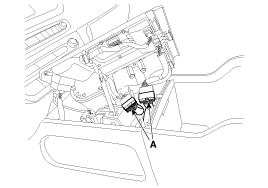
| 9. |
Disconnect the floor console connector (A).
|
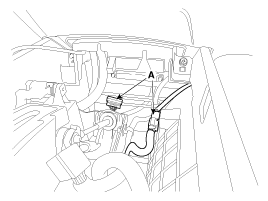
| 10. |
After loosening the mounting screws and bolts, remove the floor console assembly (A).
|
| 11. |
Install in the reverse order of removal.
|

 Floor Console Assembly Components and Components Location
Component Location
1. Floor console assembly
...
 Rear Console Cover Components and Components Location
Component Location
1. Rear console cover
...
Other Information:
ETC (Electronic Throttle Control) System Troubleshooting
Fail-Safe Mode
ItemFail-SafeETC MotorThrottle valve stuck at 7°TPSTPS 1 faultECM looks at TPS2TPS 2 faultECM looks at TPS1TPS 1,2 faultThrottle valve stuck at 7°APSAPS 1 faultECM looks at APS 2 ...
Front Disc Brake Repair procedures
Removal
1.
Remove the front wheel & tire.
Tightening torque:
88.3 ~107.9 N.m (9.0 ~11.0 kgf.m, 65.1 ~79.6 lb-ft)
2.
Loosen the hose eyebolt (B) and caliper mounting bolts (C), and t ...
Categories
- Home
- First Generation
- Second Generation
- Third generation
- Kia Sedona YP 2014-2026 Owners Manual
- Kia Sedona YP 2014-2026 Service Manual

Copyright © www.kisedona.com 2016-2026