 Kia Sedona: Crash Pad Lower Panel Repair procedures
Third generation YP (2014-2026) / Kia Sedona YP Service Manual / Body (Interior and Exterior) / Crash Pad / Crash Pad Lower Panel Repair procedures
| Replacement |
Put on gloves to protect your hands. |
|
| 1. |
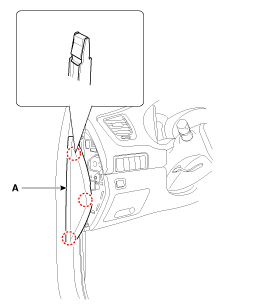
Using a screwdriver or remover, remove the crash pad side cover [LH] (A).
|
| 2. |
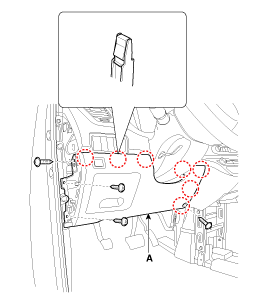
After loosening the mounting screws, remove the crash pad lower panel (A).
|
| 3. |
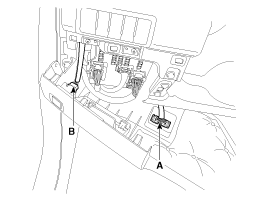
Disconnect the diagnosis connector (A) and crash pad under lamp connector (B).
|
| 4. |
Install in the reverse order of removal.
|
 Crash Pad Lower Panel Components and Components Location
Component Location
1. Crash pad lower panel
...
 Glove Box Housing Components and Components Location
Component Location
1. Glove box housing
...
Other Information:
Luggage volume
...
Output Speed Sensor Components and Components Location
Component Location
1. Output speed sensor2. Input speed sensor
...
Categories
- Home
- First Generation
- Second Generation
- Third generation
- Kia Sedona YP 2014-2026 Owners Manual
- Kia Sedona YP 2014-2026 Service Manual
Copyright © www.kisedona.com 2016-2026


